Showing posts with label planted aquarium basics. Show all posts

Friday, August 14, 2009

Starting an Iwagumi Aquascape


There's a lot to like about iwagumi aquascapes. Their simplicity is calming and beautiful and there's something special about watching a school of fish hover over a "field" of grass. Starting your own iwagumi aquascape, especially your first, is likely to lead to the exact opposite feelings: lots of pulling out of one's own hair and frustration as your aquascape is consumed by every algae known to man. Why? Well iwagumi aquascapes usually rely on only 1 or 2 species of plants, usually carpeting plants like dwarf hairgrass or HC, which don't grow particularly fast or soak up a lot of nutrients. Let's imagine a typical beginner mistake starting up an iwagumi aquascape.

When you first start an iwagumi, chances are you have some rocks, and a species or two of carpeting plants. You probably have a CO2 system of some sort, and pretty powerful lights and a fertilizing schedule. The aquarium probably looks pretty barren, aside from a few sprigs of plants strategically placed. Fast forward 3 weeks and you probably have a mess of algae that has covered your rocks, plants, and even substrate, suffocating the remaining carpeting plants into submission.

What happened? You created a perfect environment for algea. When you set up a tank, it's critical for your aquatic plants to establish a dominance, soaking up all the nutrients they can. If you don't have enough plants, algae moves in and will smother everything, thriving on the excess nutrients your plants aren't using.

So how can you avoid this when you set up your first iwagumi aquascape? The key is fast growing stem or floating plants. Add as much of these as you can, without shading out the carpeting plants. They are excellent at soaking up excess nutrients and some even release chemicals that retard the growth of algae (called allelochemicals). They don't have to disrupt your pefectly planned iwagumi layout, simply float them in your aquarium for the first few weeks, or until the carpeting plants have a chance to take hold and spread. Also, hold back a bit on fertilizing until your plants really start growing, and fertilize in proportion to the amount of plants you have in the aquarium. Gradually up the fertilizing, keeping track of algae and reducing it if you see the algae starting to crop up. This helps swing the balance in favor of your aquatic plants, and algae won't have as much of a chance to gain a foothold.

Some plants that work particularly well at keeping algae at bay in the early weeks of a newly set up aquarium are Hornwort, any hygrophila species, or any floating plant (although these can quickly become a pain to get rid of since they grow so quickly and tend to hide in everything--I'm looking at you duckweed!).

If algae does get out of balance, the best thing to do is reduce your lighting period, reduce fertilizer dosing if you are dosing too much, make sure your CO2 is steady and wait. As long as everything is balanced, your plants should be able to outcompete the algae and your iwagumi will be back on track.

Good luck!

*Photo by Mikhail Sharonin of Russia, who placed #435 in this year's IAPLC contest

Monday, July 27, 2009

Planted Aquarium Mishaps


I'm sure we've all had our share of mishaps when it comes to keeping aquariums. Mixing glass, water, and electricity is a recipe for disaster. I thought this thread about aquarium mishaps was pretty interesting, and I'll share my biggest mishaps to date.

First of all, I've come to the realization that heaters, submersible or not, are probably the most dangerous piece of equipment in an aquarium. They're often glass, and sometimes non-submersible. Combined with electricity...well, it's a bad mixture. Most of the time it's as simple as forgetting to turn the heater off when you do a water change. The heater turns on, heats up much to fast (since it's supposed to be "cooled" by water) and either burns up or, even worse, when you refill the tank, cracks the glass when it comes into contact with water again. Some heaters are designed with an auto-off switch to prevent this. I've killed at least two heaters this way. Luckily, it's fairly easy to notice, given the smoke, steam, and possible fireworks. One of mine just burned up before I raised the water back up, but the other shattered when it contacted the water. Luckily, my fish (and me!) got away without any injuries. I've vowed to never buy cheap heaters again, and always, always use a GFCI outlet or power strip (which should probably added to the 10 Items a Planted Aquarium Keeper Can't Live Without list).

Another mishap occurred when setting up my pressurized CO2 system. I bought a regulator with a bubble counter and filled it with water. I screwed the cap on tight and everything was great for about 2 weeks. Then I noticed that my water level was dropping more than normal between water changes, and the bubble counter was often full of water. It had an integrated check valve, so I wasn't worried about my regulator being damaged. However, I then realized that the floor of the stand underneath the tank was literally mushy and soaked. I examined the CO2 setup for leaks and realized that on the back side of the bubble counter, hidden out of view, was a nice big crack that must have been slowly spreading since I screwed the cap on. Each night, when the CO2 went off, water would siphon back and drip out through the crack. My stand is pretty funky inside now, and the particle board that got wet is deformed and expanded. Let's just say the floor inside isn't exactly flat anymore. I ordered another bubble counter and was extra careful screwing it in.

A few more minor mishaps:

  • I've accidentally overfilled my tank while doing a water change and watching TV at the same time. I suddenly had a waterfall in my living room! Don't multitask while filling your aquarium back up.
  • I've accidentally run my Eheim filter overnight with a kinked hose. Woke up wondering what the funny burning rubber/plastic smell was, till I realized it was my fish tank. The Eheim took it like a champ though, and still works fine.

I count myself lucky that I've avoided most major mishaps (no cracked tanks, major water damage, etc).

What about you? What planted aquarium mishaps have you had?

Friday, June 05, 2009

Common Aquatic Plant Deficiency Diagram

One of the biggest parts of growing aquatic plants is being able to "read" them and evaluate how healthy they are. Learning all of the signs of nutrient deficiencies can be confusing though, so a picture is worth a thousand words. Zapins over at APC has done exactly that and created a handy diagram showing what common aquatic plant deficiencies look like. I have to say this is a really excellent diagram that I will undoubtedly be using in the future. Nice job Zapins!

Friday, January 02, 2009

Video: How to Set Up a Pressurized CO2 System


Setting up a pressurized CO2 system for the first time can be a bit daunting. For any of you that were lucky enough to get a pressurized CO2 system for the holidays, I came across this excellent video on how to set up a pressurized CO2 system from Green Leaf Aquariums which goes through all the basic steps. Although regulators may vary, the basic steps in the video will be the same for most systems (for example, not all regulators need the working pressure adjusted). Just be sure not to screw on the bubble counter cap too tightly, or you may crack the plastic (as I did, and woke up to a puddle on the floor under the tank!).

Monday, June 09, 2008

DIY Fertilizing for the Planted Tank

Most planted tanks will require some fertilization at least now and then. For tanks that are light on nutrients and slow growing, buying pre-mixed fertlizer products, such as SeaChem's line of Flourish fertlizers, isn't prohibitively expensive. However, if you have a high-light, fast growing tank that sucks up nutrients rapidly, buying these products can quickly break the bank. This is where dry fertlizers come in.

Dry fertlizers are much cheaper and can be bought in bulk. They allow you to mix in different amounts of each nutrient to tailor it for your tank. However, using dry ferltlizers takes some knowledge of both chemistry and biology.


Plants need lots of different nutrients to grow, and aside from hydrogen and oxygen which they get from water directly, they mainly need carbon (from CO2), nitrogen, potassium, and phosphate (also known as macronutrients). These occur naturally in water to some degree, but in high-growth aquariums will be used up rapidly. When this happens, growth stunts and algae takes over. To comabt this, we use fertilizers.


The most common dry fertlizers are KNO3 (potassium nitrate), K2SO4 (potassium sulfate), and KH2PO4 (mono potassium phosphate). As you can see, these three provide the basic macronutrients. These can all be found readily online and quite inexpensively. However, it can be very confusing to determine just how much to put into your tank. This depends greatly on every single factor affecting the growth of the plants in your tank (light, CO2, other trace elements present, etc).

One way to figure out how much to use is to start off slowly and measure the levels of nitrates and phosphates to see if your plants use up what you put in. For example, test your water for nitrates, record the level, and then add a small amount of KNO3. Re-test the nitrates immediately afterwards and record the level. Then re-test the water in a day or two to see how that level compares to your first reading. If it's back to the first reading, your plants have used up all of the nitrates available, and you might need to add more next time to prevent the nitrates from "bottoming out."

An alternative to all this testing (which requires testing kits and lots of close observation) is to simply estimate and use a weekly water change to "reset" the nutrient levels. Use a fertilizer calculator, such as the Fertilator, to determine roughly how much your aquarium needs. Then, try it out for a few weeks, making sure to do the weekly water change to eliminate any excess. If you notice extra algae or stunted growth, you might need to adjust your routine. Test kits can help identify the culprit.

Either way you measure out your ingredients, you can either put the dry nutrients directly into your tank or create a pre-mixed solution (like the products available at fish stores). Either works well, however making a pre-mixed solution often makes adjusting individual nutrient amounts a headache, and often the solution will need to be refrigerated to prevent unwanted growth if not used quickly (it is a pure nutrient bath after all!).


The most difficult part of doing your own fertilization is probably figuring out how much to add. Whichever way you figure this out, once you have a routine down, you'll be saving money and have much more control over your aquarium!

Friday, December 14, 2007

Understanding Full Spectrum Aquarium Lighting

Picking the right lighting for your planted aquarium can be intimidating and confusing. There are so many options to choose from, and so many ways to measure these options. The first step to understanding full spectrum aquarium lighting is to understand what type light your plants need, and what the measurements mean.

Color temperature, measured in Kelvins, is often the easiest measure to find, after wattage. It is a measure of the overall color of the light as it appears to the human eye. Lower color temperatures appear reddish while higher temperatures appear bluish with white in the middle of the range. Often, a temperature between 5000K and 10,000K is recommended for a planted aquarium. However, two bulbs with the same color temperature may in fact be emitting very different light, some more useful to plants than others. This has to do with the different wavelengths of light, and explains why relying on color temperature alone can be misleading.

Visible light is made up of many different wavelengths, mixed together. It's the absorption or reflection of particular wavelengths that produce colors. Plants require certain wavelengths of light to carry out photosynthesis using chlorophyll. The light that chlorophyll absorbs is used to power photosynthesis. By examining the wavelengths of light absorbed by chlorophyll, we can begin to understand the needs of our aquatic plants.

As shown above, plants need the majority of the light to be around 400-450nm and 650-675nm (or blue and red light). The blue light is used for leaf growth, and promotes bushy, compact growth, while red light is mainly used for flowering and strong stems. They reflect most green light, thus explaining why leaves are green.

Armed with this information, we know that any aquarium light will need to produce large amounts of blue and red light. Most bulb manufacturers include the spectral output graph of their products on or in the packaging. Examine this output graph and try to find a bulb that matches up with the spectral absorption graph for chlorophyll. The closer the match, the better the bulb will be for your plants. For example, the following graph is for a GE 9325K bulb.

The bulb matches up fairly well, although the spike at 600nm is not really red enough (650-675nm) for a plant to fully benefit. The blue light spike is however beneficial, and the spike in greenish-yellow light will make the bulb look bright to the human eye.

Although you may not notice a major difference between bulbs, a mix between a color temperature that you like and a spectral output that your plants like will help create healthier plants and a healthier aquarium.


For more in-depth information on the science of full spectrum aquarium lighting, check out this discussion of aquarium lighting science and photosynthesis, or this aquarium light bulb comparison study. For more information on lighting metrics, check out this page on Kelvin, nanometers, PAR, and CRI.

Monday, April 30, 2007

Substrates for the Planted Aquarium

Choosing the right substrate for your planted aquarium is an important decision that will have long term affects on your plants. Although the impacts may not be as immediately visible as say lighting or CO2 choices, the substrate in your planted aquarium is a critical part of your aquarium's ecosystem and vital to the health of your plants. There are many different options, all of which have benefits and drawbacks, but I'll highlight some of the most popular options. Overall, there are a few basic requirements that must be met to be appropriate for a planted aquarium:

  • A planted aquarium substrate should not be too large or too small (usually between 3-8mm per grain). This is to accommodate root growth; grains that are too small will suffocate and crush roots while large grains won't provide enough contact with the roots.
  • A planted aquarium substrate should not affect the water chemistry negatively. Many substrates are designed for other uses, including salt water use, and may leech minerals and salts into the water. For example, crushed coral leeches calcium into the water of an aquarium. This can raise the pH and KH (carbonate hardness) in a freshwater planted aquarium to damaging levels. Substrates that maintain a constant pH level may also be undesirable, as different plants thrive under different conditions, and changing a substrate is probably one of the most difficult procedures to complete in an established aquarium.

The most valuable input and feedback on popular planted substrate brands comes from hobbyists themselves, and much of this information has been taken from planted aquarium forums. Therefore, you'll get much more information than just what it says on the label. If you have a chance, do a search for planted aquarium substrate or one of the following brands on a planted aquarium forum, such as Aquatic Plant Central. Just remember to take what you find with a grain of salt, as these are often extremely un-scientific reviews.


Planted Aquarium Specific Substrates


$20-25 for a 20lb. bag

One of the top planted aquarium substrates today, Eco-Complete is a balanced, easy to use substrate. It comes populated with beneficial bacteria, so if you are starting a new tank, you can jump-start the cycling process. It also doesn't require rinsing, which is a big pain to have to do, and an even bigger pain later if you don't do it! It comes packed with essential nutrients and minerals required for live plants and shouldn't impact your water parameters (Unless you bought a really old bag, as they did have a few quality problems about a year ago. These can be identified by milky white liquid in the bag, but they will replace the bag for free). The grain sizes are within range for optimal root growth and the appearance is of a deep black sandy gravel. It's also rounded gravel, and poses no threat to bottom feeding fish which may hurt themselves on sharp edged substrate. I use Eco-Complete almost exclusively, and for the price, you can't buy a better substrate in my opinion!


Flourite
$15-20 for a 15lb. bag

Flourite has been around for a while and is not as technologically advanced as other substrates available now but is still an old stand by. It is a clay based substrate with a reddish color that comes from its high iron content. The major drawback with Flourite is that is needs to be rinsed extensively before putting it in the aquarium, otherwise it will severely cloud up the water. It's also larger than other planted substrates and may pose a problem for plants with small, delicate roots. It doesn't have as much or as many minerals and nutrients as other planted aquariums substrates available today. However, you can't really go wrong with Flourite: it's tried and true.

ADA Aquasoil
$26 for a normal type 9L bag (roughly equivalent to a 15lb bag) from ADG

Supposedly the best planted substrate money can buy, Aquasoil is researched and manufactured by Takashi Amano's Japanese company, ADA. There are several different varieties, based on biotopes from around the world. These range from Amazonia to Malaya and Africana, all with different colors and properties to simulate the biotope for which they are named. Made up of round grains, the substrate maintains gaps allowing for water circulation to prevent roots from suffocating, although now they also sell a powdered version to make the top level of the substrate more attractive. It's engineered to lower the pH and general hardness (GH) of the water (this effect is not to be confused with the lowering of pH associated with adding CO2; simply lowering the pH using Aquasoil is not adding any CO2!). Most plants grow better at a lower pH of about 5.5-6.5. If that weren't enough, Aquasoil also acts as a passive filter, capturing floating particles. Nobody knows exactly what it's made of, but it maintains its shape long-term and provides nutrients for root feeders. I haven't been feeling wild enough to start a tank with Aquasoil yet (even though the price is now quite competitive) but others who have swear by it. If you don't have a large tank, or like knowing you bought the best money can buy, Aquasoil is for you.

Soil
Cheap!

Diana Walstad's book, Ecology of the Planted Aquarium, is your bible for using regular potting soil. Most people who use soil are following her methods to create a "el Natural" style aquarium. The benefits of this style is that it requires very little maintenance or fertilizing. However, using soil submerged can be very challenging and there are many ways to do it wrong, leading to certain disaster. Like in nature, a soil substrate does grow plants very well. If you plan to use soil, definitely read her book or ask around on planted aquarium forums for advice!

Traditional Substrates

Regular Inert Gravel
$10-15 for a 20lb bag

Believe it or not, regular intert gravel can also be used quite successfully as a planted aquarium substrate. More intensive fertilization will have to be done to maintain more demanding plants, but it is possible. If going this route, try to get smaller gravel as most gravel sold will be large and difficult to root small delicate plants and stem plants with shallow roots. If you already have an established aquarium with gravel, this is ideal, as the fish mulm has already accumulated in the gravel and will act as a fertilizer. If you are starting from scratch, root tabs or other substrate fertilizers can be used to give plants a boost until the mulm builds up.

Sand
$5 for 20lbs or less

Sand must be used with caution as a planted aquarium substrate. It is very attractive, but has many downsides. First, it tends to compact, making it very difficult for roots to grow into it. Secondly, this compacting can lead to reduced circulation and pockets of anaerobic (not requiring oxygen) bacteria thriving, creating toxic gas bubbles. To prevent this, it's best to either layer one of the other planted aquarium substrates underneath the sand or use a very large grain sand. Overall, sand is best reserved for an accent area, creating a sandy beach effect, and is not ideal for growing plants.

Substrates to Avoid

Red Sea FloraBase


I almost bought this planted aquarium substrate as it was attractive and not too expensive. However, I looked up other's thoughts online and found out that although it is a great planted aquarium substrate for the first year or so, it requires replacing (it even says so on the label). Otherwise the granules, shaped similarly to ADA Aquasoil granules, will begin to lose their shape and "melt" into mush. This can be disastrous. Coupled with the fact that changing the substrate in an established tank is all but impossible without totally destroying it, this planted aquarium substrate is one to avoid unless you tear down your aquariums every year.

Laterite (Cat Litter)

This is not really a substrate but more of an additive to substrate. It is a form of clay that contains iron and acts as a sponge to store nutrients, but is meant to be mixed into the existing substrate (usually inert gravel). However, it is clay, and thus gradually softens into a mud-like substance that if disturbed, will cloud your tank dramatically. If, like me, you move plants around frequently, this can mean a cloudy tank all the time.


So these are the top planted aquarium substrates and those to avoid as a planted aquarium substrate. There are many more options, but these are less common and more experimental. You can find an infinite number of combinations of materials and their performances on planted aquarium forums. As for substrate depth, 2-3 inches is generally the rule of thumb. Shallower than that will lead to problems with roots not being able to go deep enough and it will be hard to anchor plants. Much deeper...well why would you make it much deeper? You're keeping a fish tank, not an ant farm! Good luck!


Saturday, March 24, 2007

Do's and Don'ts of Water Changes in the Planted Aquarium

I recently received an email from a reader concerning water changes in a small 1 gallon planted aquarium. She was planning on keeping a few Heterandria formosa (tiny live bearing fish, pictured above) and live plants but had some questions about water changes:

But I can't figure out, how often and how much for water changes? Will water changes in this circumstance harm the system more than help it? What do you think?

This got me thinking. Why not write a post on the do's and don'ts of water changes in the planted aquarium? So, here they are:


Do change 30-50% of the aquarium's water every 1-2 weeks. This is variable based on fish load and filtration, but not on the aquarium's size. From 1 gallon to 100 gallons, 30-50% is a good rule of thumb. This removes all the toxins and excess nutrients that build up in the water.

Don't rely on filters to clean the water. Filters don't remove excess nutrients and toxins from the water, they just trap it so it can be removed easier when you clean your filter. However, filters also can't remove many things effectively.

Do make sure the water you use to fill the aquarium back up is the same temperature as the aquarium water. Drastic changes in temperature stress the fish and can lead to disease and even instant death in extreme cases.

Don't forget to add a water conditioner that removes chlorine and/or chloramines if you are using tap water. These can kill fish and even plants if not removed. Water conditioners also often remove heavy metals such as copper that may harm plants and fish.

Do water changes after courses of medication, after stirring up the substrate doing a re-scape, or after accidentally overdosing anything, including fertilizers. Water changes help to "reset" the aquarium by removing dissolved waste and chemicals. They are often a cure-all for many aquarium related problems, and rarely cause harm if done in moderation.

Don't remove more than 50% of the water during a water change if you can help it. Sometimes, more than 50% is needed in extreme cases (such as ammonia spikes or overdoses), but this can put stress on the fish and the beneficial bacteria in the aquarium. It can lead to rapid changes in water parameters (such as pH) that are as stressful to fish as rapid temperature changes.

Thursday, January 18, 2007

Taking the First Steps Towards a Planted Aquarium

So you currently have a fish only aquarium and you're interested in adding live plants, but you're daunted by all the equipment needed and extra time and money spent on fertilizing and trimming. You barely have the time to maintain your current set up and doubt you'd have any extra time to care for the plants. You read articles about CO2 and NPK and substrates and light levels and it all just overwhelms you to the point of giving up.

If this sounds familiar, read on.

Most people are daunted by planted aquariums, and rightly so. Obtaining a shimmering paradise of lush green plants and vibrant fish is not an easy task. You are emulating nature, and keeping everything in balance is no easy
task. The key is to start out slowly. Before spending money on lighting upgrades and CO2 systems and other bells and whistles, try some hardy, low-light plants in your current set up. As long as you have a light, there are certain plants you can grow in any aquarium. Picking the right plants is very important though. This is where a lot of people's dream of a planted aquarium dies as they watch their first (or far from first!) plants slowly wither away and die.

You need plants that are tough and don't need a lot of light. That means they aren't going to grow very fast, but they will probably survive. Here are some options for your first plants in a very low light setup (under 1.5 watts per gallon), and please note that the pictures are of specimens that were probably grown under more light and thus are more lush and green:

Java Fern - an old standby, this plant grows off of a rhizome and should not be planted in the substrate or the rhizome will rot. Simply tie it to a rock or driftwood or anchor it on top of the substrate and it will attach itself via roots. Java Ferns are very slow growers and produce little baby plants on their leaves. These can be separated once large enough and anchored and they will grow into a new plant.

Java Moss - a stringy moss that also grows slowly can be grown un-anchored (it actually naturally sinks) or tied to an object to which it will attach. Not the prettiest plant in a low light environment as it tends to be stringier, but a very hardy plant. It can become somewhat of a pest though if it gets into your filter, though I've never had a problem with this since it sinks.

Duckweed - a floating plant that grows rapidly on the surface of the water, duckweed can often be gotten for free from any pet store, where it is often an unwanted pest. It sucks up nutrients rapidly and can quickly cover the surface of your aquarium blocking most light, so if you have other plants, duckweed is not recommended. It is also quite hard to get rid of once you get it, since the leaves can be tiny and if you leave even just one behind it can turn into hundreds in a short amount of time. Some fish do enjoy eating this plant though, especially goldfish.

Anubias - Most of the Anubias available will grow in almost any light and are quite pretty. However, some grow to be quite large, so you may want to look online for a "petite" variety that tends to stay much smaller. These plants also have a rhizome and should not be buried in the substrate but tied to driftwood, rocks, or anchored above the substrate. Anubias are very slow growers as well.

Aponogetons - These plants grow from a bulb and do well in low light. They can however get quite large as well. Plant the bulb under the substrate just as you would a normal plant. Many come in the form of dried bulbs available as "mystery plants" at less than reputable pet stores. To grow it, simply plant the bulb in the substrate.


Cryptocorynes - Depending on the type of crypt, some can survive in very low light. Most of the commonly available varieties (
C. wendtii) are fairly hardy. They grow slowly, but don't like being moved around after they're rooted.


These plants shouldn't need any fertilizers aside from what you regularly feed your fish and should stay alive in almost any aquarium. Growth will be slow, but that's to be expected with these plants and low light. With these plants, you can have a planted aquarium with almost no additional effort on your part. The plants will help to clean the water and add oxygen and should increase the overall stability of the aquarium. Another benefit of these slow growing, hardy plants is that you don't have to worry about
trimming back your plants every week (except Duckweed, which may need thinning out every week or so, but all that takes is a scoop or cup).

From there you can slowly add better lights, better substrate, CO2, and fertilizers at a rate that you're comfortable with. I'd recommend adding CO2 first, before brighter lights, only because adding brighter lights with no CO2 can lead to algae problems. That and adding CO2 to an aquarium with low light can till provide a noticeable boost in plant growth (almost as big as a new light).

Or you can simply enjoy it as is. You can certainly make an attractive planted aquarium without any additional technology or effort. So go ahead, add a few hardy plants and take the plunge into planted aquariums!

Wednesday, January 10, 2007

Benefits of Plants in the Aquarium


While surfing around the other aquarium websites on the internet, most dealing with fish only freshwater aquariums, I noticed that a large part of keeping a fish only aquarium is trying to overcome the drawbacks of not having live plants. It also made me realize how hard it was to actually keep fish when I still had a fish only aquarium. Diseases such as Ich were commonplace, and although the medicine was available to treat the diseases, I still invariably lost a few fish along the way. This never struck me as strange until now. Instead of desperately trying to keep the fish alive, in a planted aquarium the goal shifts to keeping the plants happy. If the plants are happy, the fish thrive. This is due to the immense benefits that keeping live plants in an aquarium can bring, including:

Aeration - Fish only aquariums are often aerated with an airstone in a desperate attempt to keep oxygen levels high so fish can breathe. In a planted aquarium, as in nature, the live plants provide all the oxygen your fish will ever need through photosynthesis. An airstone and air pump (and all the noise and vibration that go along with them) are unnecessary in a planted aquarium.

Filtration - Power filters, sponge filters, and canister filters are the only means of filtration in a fish only aquarium. It's up to these filters to remove all fish waste and waste produced by excess food. This is achieved through mechanical filtration, chemical filtration (via carbon), and biological filtration (via bacteria growing on the filter media). There are many designs of filters out there and some are better than others, but all suffer from one flaw: if not cleaned properly and regularly, their effectiveness drops. In a planted aquarium, on the other hand, only mechanical filtration is truly needed. Plants can handle chemical and biological filtration fairly well. They absorb chemicals that are harmful to fish (in fact they live off of the chemicals produced by fish waste) and provide a perfect medium for beneficial bacteria to grow on. Of course, plants have their limits of filtration as well and most planted aquariums have a back up filter providing mechanical and biological filtration. Chemical filtration in the form of carbon will remove beneficial compounds and fertilizers needed by plants, and is not advised for a planted aquarium.

Protection - In fish only aquariums, the focus is the fish themselves, and their environment can be somewhat neglected. Not having enough protection can cause fish to be stressed and more succeptable to disease. Although artifical decorations and plants can be bought and put in the aquarium to provide protection and cover for fish, they are inferior to real plants in many ways. First, they provide none of the benefits listed so far aside from a location for beneficial bacteria to colonize. Second, they are much more likely to injure fish. Live plants aren't hard and don't have sharp edges like plastic plants can.

Food Source - The only source of food in a fish only aquarium is the owner of the aquarium (aside from algae for algae eaters). That means the fish are entirely dependent on you and the food you give them. If you don't make wise choices and vary their diet, they may not be as healthy and can become more succeptable to disease. Also, if you forget to feed them, they have no alternative food sources. In a planted aquarium, the fish have a choice. Although not all fish will eat plants, most will pick at the leaves and dead or dying plant matter if no other food is available. It also helps to vary their diet. Many fish are omnivorous and need to eat plant material.

Algae Prevention - Algae is often a problem in fish only aquariums, and although keeping algae eaters and scraping the glass with an algae scraper are ways of combatting some algae, other types of algae are more stubborn. Algae occurs because there are nutrients in the water and there is light (even low light). In a planted aquarium, plants can outcompete algae and use up all of the nutrients in the water. Although this can open up a whole other can of worms while you try to get your light levels and nutrient levels right, once you get your planted aquarium balanced, you will most likely never have to clean the glass or pull algae off the gravel again.

And there you have it. These are only the practical benefits I can think of, there are many many more benefits to owning a planted aquarium, and it's easier than you may think. Even just a few floating plants can make a serious impact in the health of your fish and the tank as a whole. So what are you waiting for? Throw out that noisy air pump and dirty airstone, toss the neon pink plastic plants and cheesy castle decoration, and take the plunge into a planted aquarium. Your fish will thank you!

Thursday, December 14, 2006

Beginner's Guide to Planted Aquarium Supplies and Equipment

I've decided to try to take a stab at an idea suggested by a visitor and create a shopping list of essential supplies and equipment needed to start and maintain a planted aquarium. As I thought about exactly what was needed, I realized that the supplies and equipment needed depends greatly on one thing: the amount of light in the aquarium. As I've mentioned before, the light in the aquarium is the engine driving the mini-ecosystem. The more light you have, the more equipment and supplies you'll need to keep that ecosystem running smoothly.

All planted aquariums need light, obviously. So the number one item on the list is a light. Lights come in all shapes and sizes and powers (see a guide to making your own cheap high powered lights). How much light you have on your aquarium will determine the rest of the list.

For low light aquariums (1.5-2 watts per gallon unless you have a very small or very large aquarium, then read this post on light in the aquarium) the equipment and supplies needed are minimal. Most are required for any aquarium:
  • Light (at least 1.5 watts per gallon)
  • Filter (biological and mechanical, the plants will take care of chemical)
  • Heater
  • Substrate (can be plain gravel, though not ideal)
That's really all you need. In a bare-bones setup like this, you won't grow fancy plants or even grow things particularly well, but low light plants should survive just fine. As you can see, as long as you have an aquarium with fish already, you will likely only need a better light.

For medium light
aquariums (2-3 watts per gallon) you will start to need to supplement your plants for them to grow healthy:
  • Trace element fertilizer (such as Seachem Flourish or CSM+B)
For high light aquariums (3+ watts per gallon) you must add the following items otherwise your aquarium will quickly become an algae farm:
  • CO2 system or Flourish Excel
  • Nitrogen, potassium, and phosphorous fertilizers.
As you increase the amount of light on your aquarium, you increase the demands in terms of fertilizers. Once you get into the high light category, you really need to add fertilizers otherwise the plants will suffer and algae will take over.

It is important to remember, if you add fertilizers or CO2 to a low light aquarium in the proper amounts, you will still see an improvement in growth. There's no rule that says that low light aquariums shouldn't have CO2 or fertilizers. You just have to remember that plants aren't going to grow as quickly and won't need as much fertilization as plants in a high light tank.

As a beginner, I'd recommend starting out with low light and working your way up. Diving straight into a high light aquarium can lead to things quickly spiralling out of control. That, and it's fairly easy to upgrade your aquarium as you go.

Monday, November 20, 2006

Shrimp in the Freshwater Aquarium

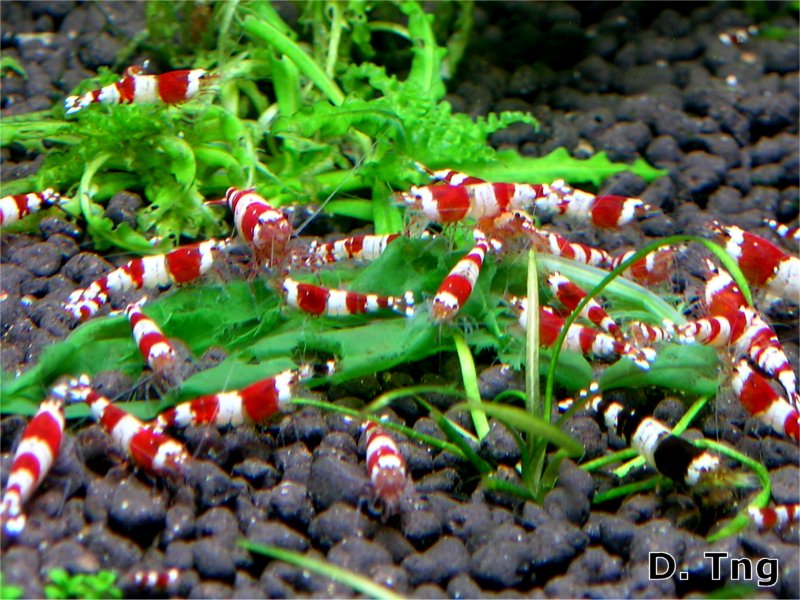
Crystal Red Shrimp

Keeping freshwater shrimp can be extremely rewarding. If you're bored of fish, or want something other than fish in your aquarium that requires less maintenance, shrimp are a great option. In fact, many people keep tanks of just shrimp! There is just as much variety in the types of shrimp you can keep as the types of fish available. They come in all sizes and colors, range from very easy to keep to quite difficult, and are both easy to breed and nearly impossible in a freshwater aquarium. However, there are a few important things to consider when thinking about adding shrimp in general to an aquarium.

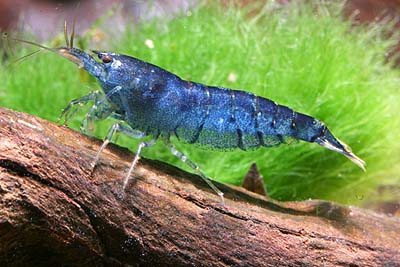
Blue Tiger Shrimp

First, you must consider your existing tankmates (should you have any). Shrimp come in all shapes and sizes, but in general are on the smaller side (around an inch or two). This makes them tasty snacks for larger fish. If you have any large fish, like Oscars or other cichlids, you may want to avoid wasting your money. Also, certain fish eat shrimp in the wild and will quickly consume any you may buy for your aquarium. These shrimp eating fish include loaches, puffers, and some gouramis. Mixing shrimp with fish is also not always a good investment due to the fact that if you buy a type of shrimp that does breed easily, baby shrimp will most likely be quickly snapped up. Therefore, your population will not replenish itself and the larger shrimp will die of old age.

Amano Shrimp

Second, the aquarium is filled with hazards for shrimp that don't exist in the wild, namely filter intakes. Most are shielded somewhat, and this does the job for most adult shrimp unless the filter is particularly strong. However, baby shrimp will be sucked into the filter and, depending upon what type of filter you have, either lead very boring lives stuck in a canister filter or be smashed to death in the impeller. To prevent this, you can either put a piece of stocking over the end of the intake and secure it with a rubber band or plastic tie; cut a hole in a sponge like the types you buy for filter media and stick this over the intake, or switch to air-driven sponge filters. The stocking and sponge options will qu
ickly clog with debris and need to be taken out and cleaned every week or two, so they are quite intensive. The sponge on the other hand is guaranteed not to bubble anything to death, but it will disperse CO2 if you are using it in your aquarium, and they tend to be quite large and ugly (not to mention take up valuable space inside the aquarium).

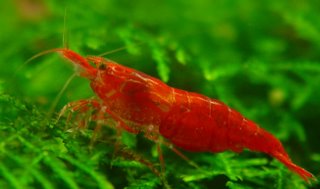
Cherry Shrimp

Third, make sure the type of shrimp you want matches your aquarium. Neocaridina japonica, or Amano shrimp, grow to be up to 2 inches long and eat algae, but the eggs will not hatch in freshwater. These are best suited for aquariums with fish. Crystal red shrimp can be upwards of $50 per shrimp for a good pattern and are very sensitive to water conditions, but will breed quickly if conditions
are right. You wouldn't want to put those in with fish unless you like to give your fish very expensive snacks. Do a little research on the type of shrimp you are interested in and make sure it works with your current or planned setup.

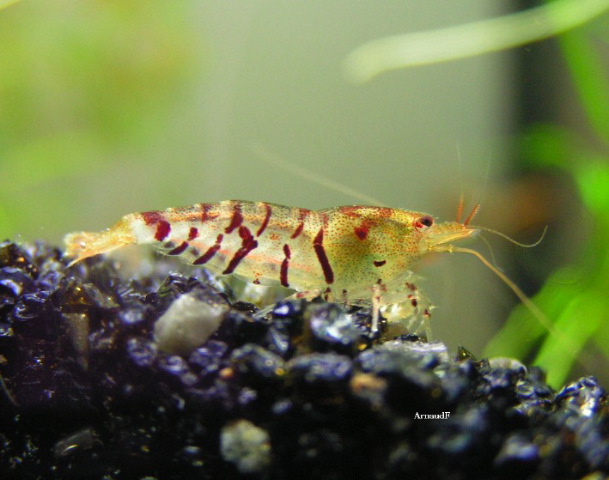
Tiger Shrimp

Finally, shrimp should only be put in a mature tank as t
hey are very sensitive to ammonia and nitrates. They are much more picky about water parameters. I've found that adding certain fertilizers containing trace elements will kill off my Cherry shrimp, but not my Amano shrimp (most likely due to the copper or other heavy metals in the fertilizer). A tank should not be medicated when shrimp are in it. They are often much more sensitive to medications than fish: copper being the most lethal. Even foods should be examined to make sure they do not contain copper.

Overall, shrimp are an excellent addition to an aquarium, and will add color, fun, and help clean the tank!

Wednesday, November 01, 2006

10 Items a Planted Aquarium Keeper Can't Live Without

There are certain items that I've found are extremely useful if not essential for maintaining a successful planted aquarium. Here are the top ten that I wouldn't be able to live without:

1. Python No Spill Clean N' Fill - ($28.99) This is a lifesaver when it comes to doing weekly water changes on three tanks. I've never had to live without it and I hope I never will. This handy tool allows you to use your faucet as a vacuum to draw water out of your aquariums and then fill them back up with a flip of a switch.

2. Mag-Float - ($5.99-109.99) This powerful magnet makes it really easy to clean off algae on the glass of your aquarium. It's designed not to scratch the glass and can be bought for acrylic aquariums as well. A few simple strokes with one of these and green spot algae is wiped away. A quick fix so you can see your plants and fish!

3. Aquatic Forceps - ($1.99-4.99) Extremely helpful when planting tiny plants in deeper aquariums, and even for grabbing things when fingers are too clumsy. If you are planting any sort of ground cover or small stemmed plants, these can prevent much frustration and ripping out of one's own hair.

4. UV Sterilizer - ($30.00+) Although many will argue with me that a UV sterilizer is not necessary, it sure does help a lot. After trying to combat my first outbreak of green water by myself with blackouts which killed half my plants, I invested in a cheap UV sterilizer and it has made the difference between having crystal clear water and pea soup. Even if you don't have green water, it cleans up the water so well the water is extremely clear.

5. Fertilizers - (prices vary) A good set of fertilizers (nitrogen, potassium, phosphate, and trace elements) is vital for keeping healthy plants. There are a number of different sources of fertilizers, but the two best are Seachem Flourish and Greg Watson. Seachem fertilizers come ready to use in a bottle but are far more expensive while Greg Watson's fertilizers come in dry powders at must be measured yourself but they are very inexpensive.

6. Water Conditioner - (prices vary, under $10.00) A decent water conditioner will make the difference between healthy fish and dead fish. A staple even in fish only aquariums, you may already have a water conditioner. However, some are better than others and some remove more impurities than others. Generally, Tetra Aquasafe, Kordon NovAqua, and Seachem Prime are the top of the line conditioners.

7. pH Test Kit - (prices vary, under $10.00) You may already have one of these if you keep a fish only aquarium, but it will be invaluable in a planted aquarium. pH allows you to roughly determine CO2 levels and keep them within an acceptable level. Also, some plants prefer acidic or alkaline water, so frequent pH testing will become habit. Dip strip test kits are fairly accurate and generally alright, but are not accurate enough for extremely precise measurements.

8. Nitrite/Nitrate Test Kit - (prices vary, under $10.00) Somewhat more important than a pH test kit in a planted aquarium is a nitrate/nitrite test kit. Nitrite is poisonous to fauna and is converted into nitrate by bacteria. However, if something goes wrong, having a test kit to measure levels of nitrate/nitrite may be the only way to prevent all of your fish from dying if you act quickly. It is also important because nitrate is one of the three major fertilizers for plants, and maintaining a steady level keeps growth regular and plants from stunting.

9. Aquatic Tissue Scissors - ($2.99-5.99) When it comes time to trim plants, you'll need a pair of sharp, precise scissors to make clean cuts to prevent damage to your plants. You'll also need scissors that won't rust when exposed to water frequently. These aquatic tissue scissors are perfect for the job, making trimming quick and painless for your plants.

10. Planted Aquarium Substrate - ($15.00-$40.00) Last but not least, a good planted aquarium substrate makes an enormous difference in a planted tank. If you've ever tried planting some plants in regular aquarium gravel or struggled to get fine-rooted pants to grow, you'll understand. These substrates are specially made to make it easier to grow plants. They are often more fine, allowing better root growth and many contain fertilizers as well. Each brand has its own positives and negatives, but I've never been unhappy with my Eco-Complete from Caribsea. Most substrates are black or dark brown too, which brings out the colors of your fish and plants better than a white or artificial color often found in regular aquarium gravel.

Thursday, October 26, 2006

Methods of Diffusing CO2 in the Aquarium

In order to have any effect on plant growth, CO2 gas must be dissolved into the water of your aquarium. Just letting it bubble out of a tube from your DIY Yeast CO2 generator or CO2 tank will have little to no effect on CO2 levels in the tank, especially if you're using a yeast generator (see the DIY yeast CO2 recipe). This is because larger bubbles don't dissolve as quickly as smaller bubbles. So the ultimate goal of diffusing CO2 into an aquarium is to make the smallest bubbles possible, and them keep them from reaching the surface for as long as possible. You need a reactor, or a device that breaks up the large bubbles into smaller bubbles and mixes it with the aquarium water. Below are the most popular methods for diffusing CO2 in the aquarium:

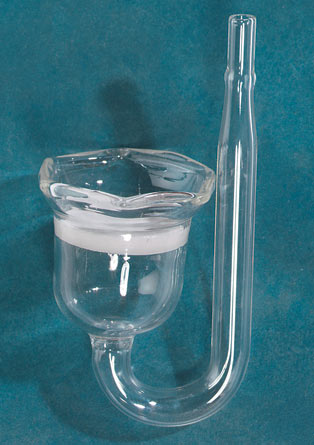
Bell - (very low efficiency) About the most low-tech way of dissolving CO2 is by using a bell-shaped (or any shape as long as it holds gas) container turned upside-down in your tank. The CO2 tubing is placed underneath the bell and the CO2 bubbles rise up and collect inside the upside-down container. The CO2 dissolves passively and very very slowly. This will give you almost no CO2 concentration in your aquarium just because you can't run the CO2 faster than it dissolves and it dissolves so slowly, plants probably use up the CO2 as soon as it dissolves. One way to make it moderately more efficient is to aim a powerhead or filter exhaust across the bottom of the bell (the open end). This diffusor can be made quite easily at home.

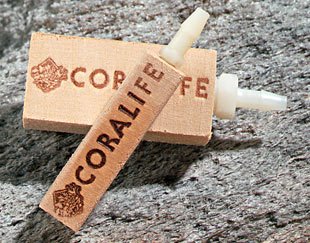
Airstone - (very low efficiency) This is probably the second least efficient way of dissolving CO2 in your aquarium, but with a little ingenuity it can be made more effective. Try to get the airstones that create the finest bubbles. Limewood airstones are best, but they clog fairly quickly. These make fairly small bubbles, but to be really effective you have to keep the bubbles from racing up to the surface and escaping. Try to position the airstone as deep as possible. You can also put the airstone under the intake or exhaust of a filter or powerhead to trap the bubbles and send them with the current, thus keeping them in the water for longer and increasing the efficiency.

Glass Diffusor - (low to medium efficiency) One of the most popular methods due to its ease and low cost, it is slightly better than a regular airstone, although it is basically the same principle. A ceramic disk emits fine bubbles, finer than an airstone. However, this disk can collect dirt and debris and become clogged with algae, creating much larger bubbles and reducing its efficiency. A soak in bleach will help to clear the blockages. Again, try to position the glass diffusor as deep as possible in the tank. It can also be made much more efficient by placing it under the intake or exhaust for a filter or powerhead. Glass diffusors often need higher pressure to work and they may not work well or work at all with DIY yeast CO2 systems.

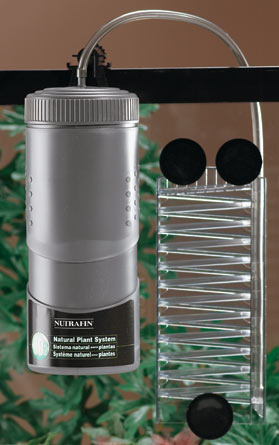
Bubble Ladder - (low to medium efficiency) This is another inexpensive, simple option which consists of a series of zig-zagged ramps or a twisted ramp placed on upright on the side of the aquarium. CO2 enters from the bottom and the bubble is forced to travel along these ramps to reach the surface. Meanwhile, the movement helps to dissolve the bubble. These work by extending the amount of time the bubble takes to reach the surface, thus giving it more time to dissolve. However, the bubble is rarely completely dissolved by the time it reaches the end of the ramp and is allowed to escape to the surface. The downside to these is that they are often big, bulky, and ugly and there is no real way to hide them.

Filter or Powerhead Intake - (medium to high efficiency) Perhaps the easiest high efficiency option is using a filter or powerhead as a reactor. All you need to do is put the CO2 tube into the intake of either a canister filter or powerhead. The motor will suck up the bubbles which will be either immediately pulverized by the impeller (powerhead) or drawn through the filter media, dissolving rapidly along the way due to the high flow, and then into the impeller (canister filter). Most ot the time when using a canister filter, you won't even see the bubbles coming out of the exhaust as almost all of the CO2 is dissolved. A powerhead is a little less efficient, as it just spews the fine bubbles into the tank and some of these rise to the surface and escape, but not before taken on a wild ride around your aquarium. Depending on the filter or powerhead, the CO2 bubbles can make a fairly loud ticking or whooshing sound as they are met by the impeller blades, and some aquarists may find this too annoying.

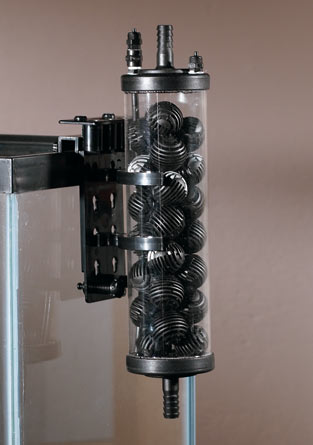
In-line Reactor/Counter-flow Reactor - (high to very high) These can be DIY or bought, but tend to be quite expensive to buy or labor intensive to make. However, they can't be beat in terms of efficiency if they are working correctly (another issue if you build it yourself). It's basically a chamber connected to the exhaust of a canister filter or powerhead placed vertically. The lower end of the chamber is often left open or covered with a sponge, unless it is an in-line design, where the bottom is connected to tubing that returns to the tank. The CO2 is released into the chamber, and as it tries to rise to the surface, it is pushed back by the flow of water. Even if it makes it to the top of the chamber, it has nowhere to go but back into the flow of water (the top of these chambers is often shaped like a funnel to force the bubbles back into the flow). To make it more effective, bio-balls or other oddly shaped filter media can be put inside to help break up the CO2 bubbles as they are tossed around. The biggest problem with these reactors is that since they don't have any effective means of breaking up the larger bubbles, if too much CO2 is pumped in and the flow isn't strong enough, the bubbles collect and form larger bubbles which dissolve much slower. So balancing the flow of the water and the flow of CO2 is critical to achieving optimal diffusion.

Wednesday, October 25, 2006

Build Your Own Yeast CO2 Generator

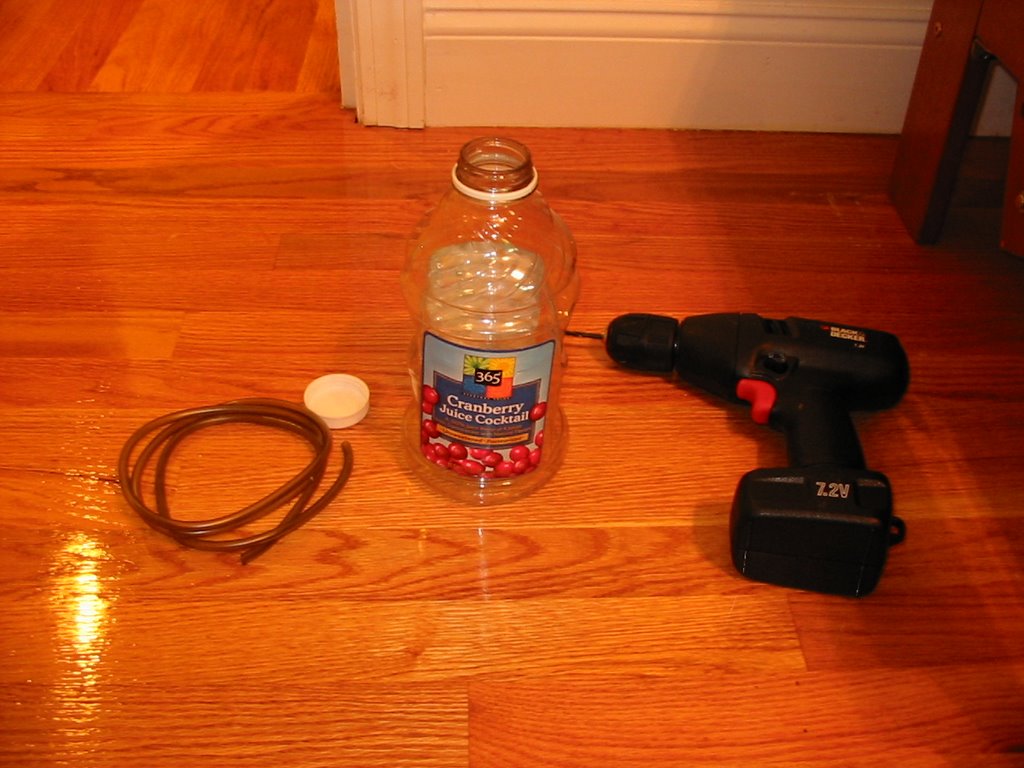
The easiest way to provide your planted aquarium with CO2 gas (a vital fertilizer) is to make your own yeast powered CO2 generator. This can be done very easily and inexpensively (all you need to buy is tubing and the supplies for the yeast recipe). Below are the tools and supplies required:


Any juice container will work, or any container with a tight fitting lid for that matter. However, some containers work better than others. I've always had good results with juice containers whereas some of the othe containers I've tried (like the big iced tea jugs) don't make an airtight seal when closed. You can use any size, however 48-64 ounce containers are a good size. They fit the 2 cups sugar called for in most recipes and don't take up a huge amount of space. The bigger the generator, the more water there is which dilutes the alcohol byproduct that eventually kills the yeast, so larger containers will last longer as long as you add the same amount of ingredients. The tubing can be any kind of airline tubing, however standard airline tubing will eventually go hard and crack from exposure to CO2. Using silicone or CO2 resistant tubing is best. A drill is nice, but if you don't have one, the same result can be acheived with a nail or screw.

Step 1
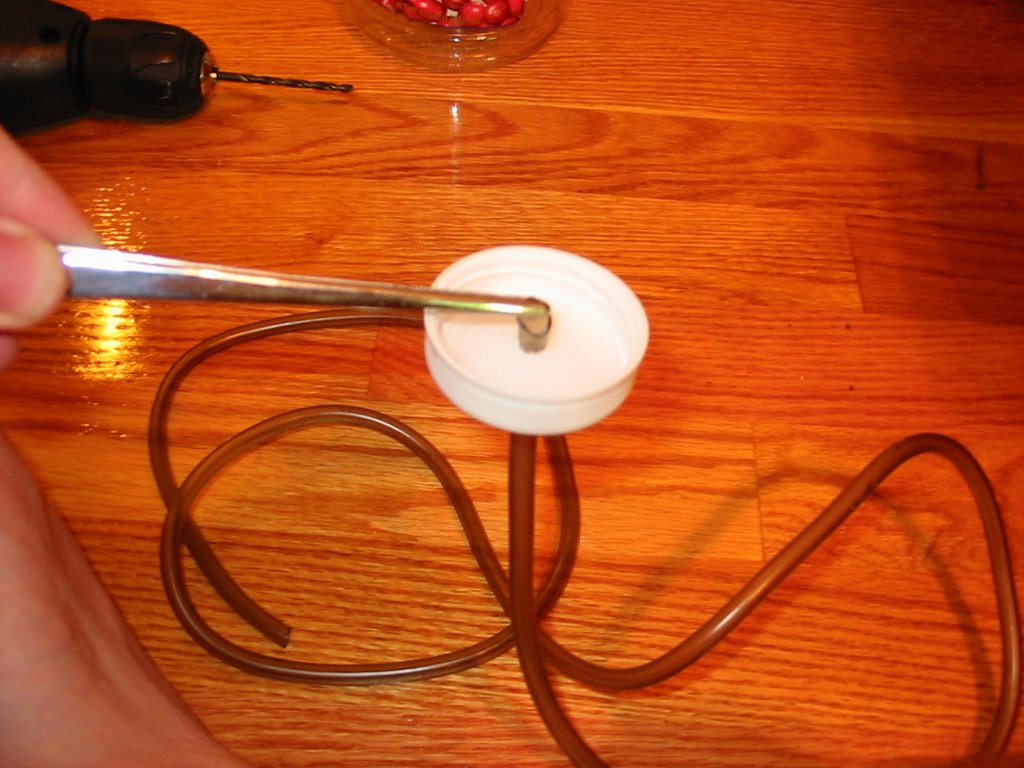
Drill a hole in the lid smaller than the diameter of the tubing, but large enough so you think you'll be able to squeeze it through. I use a smaller drill bit and then widen the hole with a pair of aquarium tweezers. Remember you can only make the hole larger, so don't get overzealous.

Step 2
Cut the end of the tubing on a diagonal and push it through the hole in the lid as shown, using tweezers or pliers to grab it on the other side and pull it through. If it doesn't seem to fit, make your hole bigger. If you don't need pliers or tweezers, the hole is too big and CO2 will leak out. If this happens, you need a new container (or at least a new lid). Pull it through only a half an inch or less.


Step 3
This is the finished cap and tubing. The seal should be tight enough to prevent leakage. There is no need for glue or silicone if it is done right. Just screw the lid on and you're ready to mix up your yeast solution!

The Final Product: A DIY Yeast Generator

There are a few important things to remember about DIY yeast generators.
  • First, they are under pressure. Although it is highly unlikely they will burst, it does happen if the tubing gets clogged. Make sure the gas has a clear path to your tank. Some people add a check-valve between the tank and the generator to prevent yeast bubbles and goo from going up the tubing. Personally I've never had this happen and adding a check valve only makes another possible leakage point. As long as you don't overfill or shake up your mixture, it shouldn't get into the tubing.
  • Also remember that if you squeeze the bottle (even gently), once you release it, it will suck up aquarium water. This can form a siphon and once it does, aquarium water will flood your generator. This will ruin the reaction (other bacteria and organisms in the water will out-compete the yeast) and can make a big mess. So be careful and set the generator down before screwing on the lid and connecting it to the tank.
  • Finally, a DIY yeast generator is a rather low powered CO2 generator, so diffusing all that CO2 most effectively and stopping leaks is paramount. One leak can make the whole thing not work. A cheap idea for diffusing the CO2 in the tank (called a reactor) is to put the tubing from the generator into the input of a powerhead or canister filter. The impeller will suck up and pulverize the CO2 bubbles, creating a fine mist that will dissolve much faster. Look for an article soon on the different type of CO2 reactors!

Popular Posts

Sponsors

PetSmart

Planted Aquarium Books