 One of the biggest parts of growing aquatic plants is being able to "read" them and evaluate how healthy they are. Learning all of the signs of nutrient deficiencies can be confusing though, so a picture is worth a thousand words. Zapins over at APC has done exactly that and created a handy diagram showing what common aquatic plant deficiencies look like. I have to say this is a really excellent diagram that I will undoubtedly be using in the future. Nice job Zapins!
Showing posts with label fertilizer. Show all posts
Showing posts with label fertilizer. Show all posts
Friday, June 05, 2009
Common Aquatic Plant Deficiency Diagram
One of the biggest parts of growing aquatic plants is being able to "read" them and evaluate how healthy they are. Learning all of the signs of nutrient deficiencies can be confusing though, so a picture is worth a thousand words. Zapins over at APC has done exactly that and created a handy diagram showing what common aquatic plant deficiencies look like. I have to say this is a really excellent diagram that I will undoubtedly be using in the future. Nice job Zapins!

Monday, June 09, 2008
DIY Fertilizing for the Planted Tank
 Most planted tanks will require some fertilization at least now and then. For tanks that are light on nutrients and slow growing, buying pre-mixed fertlizer products, such as SeaChem's line of Flourish fertlizers, isn't prohibitively expensive. However, if you have a high-light, fast growing tank that sucks up nutrients rapidly, buying these products can quickly break the bank. This is where dry fertlizers come in.
Dry fertlizers are much cheaper and can be bought in bulk. They allow you to mix in different amounts of each nutrient to tailor it for your tank. However, using dry ferltlizers takes some knowledge of both chemistry and biology.
Plants need lots of different nutrients to grow, and aside from hydrogen and oxygen which they get from water directly, they mainly need carbon (from CO2), nitrogen, potassium, and phosphate (also known as macronutrients). These occur naturally in water to some degree, but in high-growth aquariums will be used up rapidly. When this happens, growth stunts and algae takes over. To comabt this, we use fertilizers.
The most common dry fertlizers are KNO3 (potassium nitrate), K2SO4 (potassium sulfate), and KH2PO4 (mono potassium phosphate). As you can see, these three provide the basic macronutrients. These can all be found readily online and quite inexpensively. However, it can be very confusing to determine just how much to put into your tank. This depends greatly on every single factor affecting the growth of the plants in your tank (light, CO2, other trace elements present, etc).
One way to figure out how much to use is to start off slowly and measure the levels of nitrates and phosphates to see if your plants use up what you put in. For example, test your water for nitrates, record the level, and then add a small amount of KNO3. Re-test the nitrates immediately afterwards and record the level. Then re-test the water in a day or two to see how that level compares to your first reading. If it's back to the first reading, your plants have used up all of the nitrates available, and you might need to add more next time to prevent the nitrates from "bottoming out."
An alternative to all this testing (which requires testing kits and lots of close observation) is to simply estimate and use a weekly water change to "reset" the nutrient levels. Use a fertilizer calculator, such as the Fertilator, to determine roughly how much your aquarium needs. Then, try it out for a few weeks, making sure to do the weekly water change to eliminate any excess. If you notice extra algae or stunted growth, you might need to adjust your routine. Test kits can help identify the culprit.
Either way you measure out your ingredients, you can either put the dry nutrients directly into your tank or create a pre-mixed solution (like the products available at fish stores). Either works well, however making a pre-mixed solution often makes adjusting individual nutrient amounts a headache, and often the solution will need to be refrigerated to prevent unwanted growth if not used quickly (it is a pure nutrient bath after all!).
The most difficult part of doing your own fertilization is probably figuring out how much to add. Whichever way you figure this out, once you have a routine down, you'll be saving money and have much more control over your aquarium!
Wednesday, October 25, 2006
Build Your Own Yeast CO2 Generator
The easiest way to provide your planted aquarium with CO2 gas (a vital fertilizer) is to make your own yeast powered CO2 generator. This can be done very easily and inexpensively (all you need to buy is tubing and the supplies for the yeast recipe). Below are the tools and supplies required:
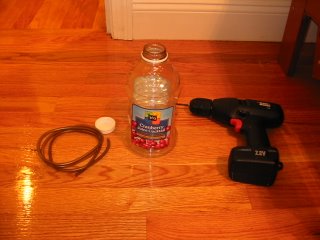
Any juice container will work, or any container with a tight fitting lid for that matter. However, some containers work better than others. I've always had good results with juice containers whereas some of the othe containers I've tried (like the big iced tea jugs) don't make an airtight seal when closed. You can use any size, however 48-64 ounce containers are a good size. They fit the 2 cups sugar called for in most recipes and don't take up a huge amount of space. The bigger the generator, the more water there is which dilutes the alcohol byproduct that eventually kills the yeast, so larger containers will last longer as long as you add the same amount of ingredients. The tubing can be any kind of airline tubing, however standard airline tubing will eventually go hard and crack from exposure to CO2. Using silicone or CO2 resistant tubing is best. A drill is nice, but if you don't have one, the same result can be acheived with a nail or screw.
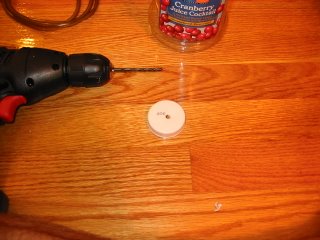 Step 1
 Step 2
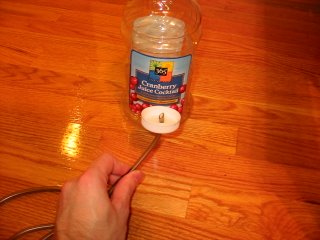 Step 3
 The Final Product: A DIY Yeast Generator
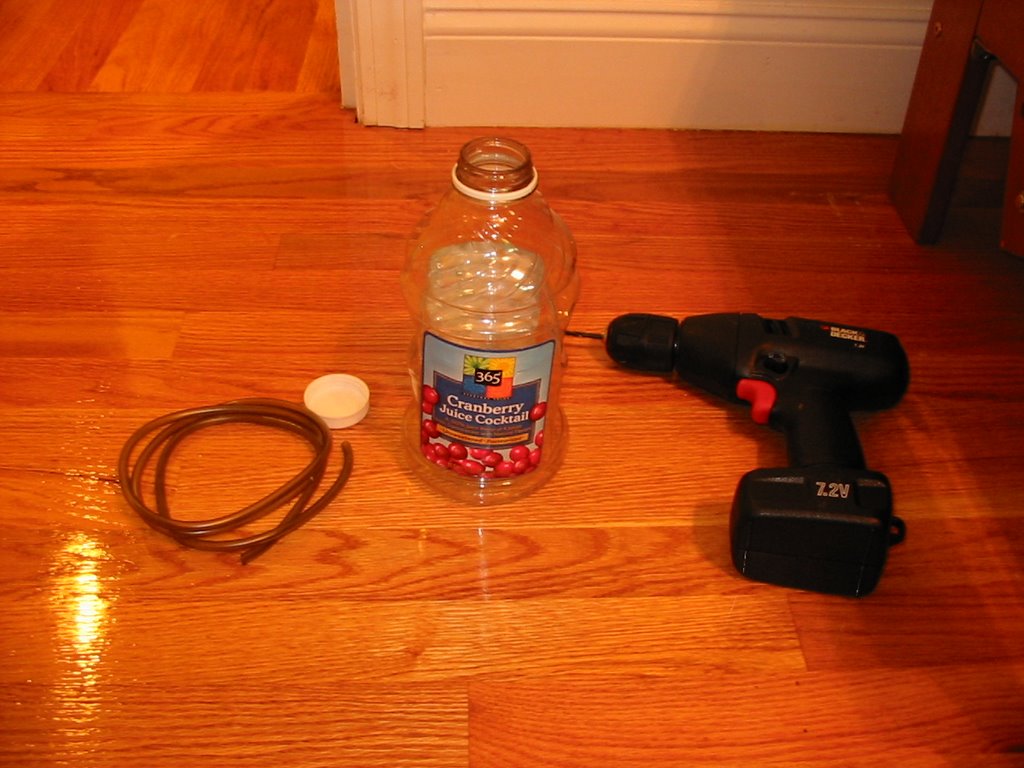
Any juice container will work, or any container with a tight fitting lid for that matter. However, some containers work better than others. I've always had good results with juice containers whereas some of the othe containers I've tried (like the big iced tea jugs) don't make an airtight seal when closed. You can use any size, however 48-64 ounce containers are a good size. They fit the 2 cups sugar called for in most recipes and don't take up a huge amount of space. The bigger the generator, the more water there is which dilutes the alcohol byproduct that eventually kills the yeast, so larger containers will last longer as long as you add the same amount of ingredients. The tubing can be any kind of airline tubing, however standard airline tubing will eventually go hard and crack from exposure to CO2. Using silicone or CO2 resistant tubing is best. A drill is nice, but if you don't have one, the same result can be acheived with a nail or screw.
 Step 1
Drill a hole in the lid smaller than the diameter of the tubing, but large enough so you think you'll be able to squeeze it through. I use a smaller drill bit and then widen the hole with a pair of aquarium tweezers. Remember you can only make the hole larger, so don't get overzealous.
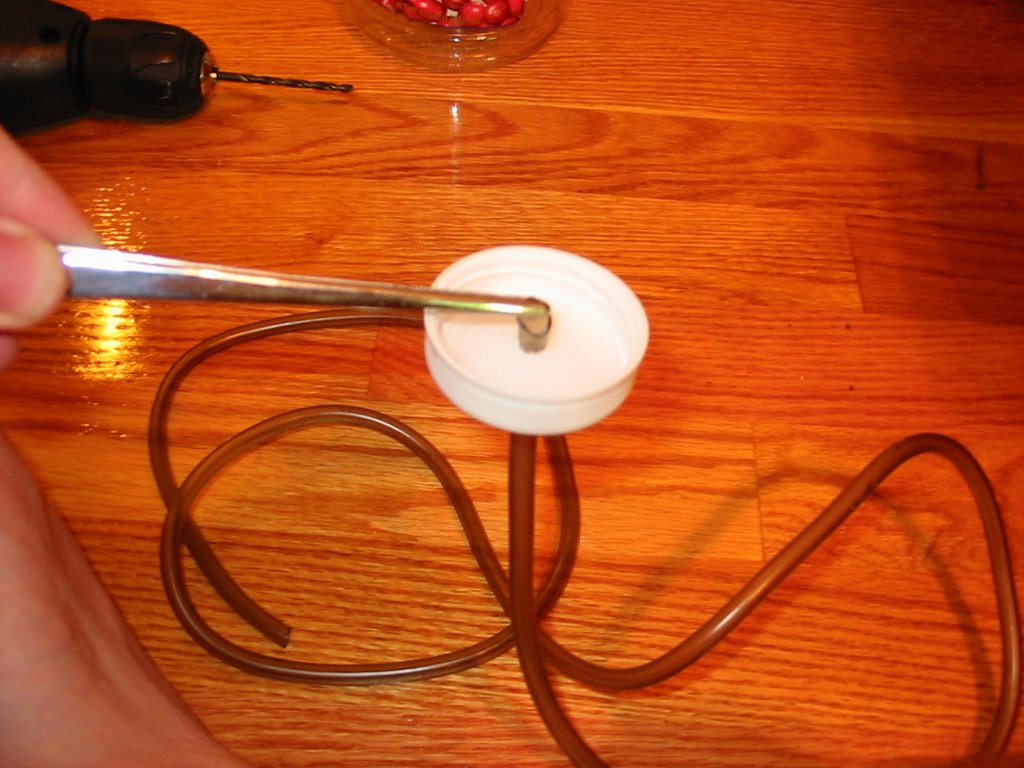 Step 2
Cut the end of the tubing on a diagonal and push it through the hole in the lid as shown, using tweezers or pliers to grab it on the other side and pull it through. If it doesn't seem to fit, make your hole bigger. If you don't need pliers or tweezers, the hole is too big and CO2 will leak out. If this happens, you need a new container (or at least a new lid). Pull it through only a half an inch or less.
 Step 3
This is the finished cap and tubing. The seal should be tight enough to prevent leakage. There is no need for glue or silicone if it is done right. Just screw the lid on and you're ready to mix up your yeast solution!
 The Final Product: A DIY Yeast Generator
There are a few important things to remember about DIY yeast generators.
- First, they are under pressure. Although it is highly unlikely they will burst, it does happen if the tubing gets clogged. Make sure the gas has a clear path to your tank. Some people add a check-valve between the tank and the generator to prevent yeast bubbles and goo from going up the tubing. Personally I've never had this happen and adding a check valve only makes another possible leakage point. As long as you don't overfill or shake up your mixture, it shouldn't get into the tubing.
- Also remember that if you squeeze the bottle (even gently), once you release it, it will suck up aquarium water. This can form a siphon and once it does, aquarium water will flood your generator. This will ruin the reaction (other bacteria and organisms in the water will out-compete the yeast) and can make a big mess. So be careful and set the generator down before screwing on the lid and connecting it to the tank.
- Finally, a DIY yeast generator is a rather low powered CO2 generator, so diffusing all that CO2 most effectively and stopping leaks is paramount. One leak can make the whole thing not work. A cheap idea for diffusing the CO2 in the tank (called a reactor) is to put the tubing from the generator into the input of a powerhead or canister filter. The impeller will suck up and pulverize the CO2 bubbles, creating a fine mist that will dissolve much faster. Look for an article soon on the different type of CO2 reactors!
Subscribe to:
Posts (Atom)
Popular Posts
-
 I was curious as to how the tank above, which took World Ranking 7 in the ADA aquascaping contest this year , created the waterfall illusion...
 -
 When it comes to combating algae in the aquarium, balancing nutrients and water quality will only take you so far. The most powerful tool in...
 -
The second most difficult part about adding a yeast-powered CO2 system to your planted aquarium, after ripping all your hair out trying to f...
-
For those of you starting out in the world of planted aquariums, I've picked my top three mistakes I've seen people make when starti...


Sponsors

