 |
| Beniamino by Alberto Sosa |
Showing posts with label aquascaping. Show all posts
Showing posts with label aquascaping. Show all posts
Thursday, August 12, 2010
Alberto Sosa's Beniamino Aquascape

Tuesday, December 09, 2008
Aquascaping Answers
 Judging by the number of emails I get with questions about aquascaping or keeping plants, you have questions. Instead of answering them directly, I've decided to open it up and allow others to benefit from the questions and answers. So here's how this will work:
 Ask a question about aquascaping, keeping aquatic plants, plant-friendly fish, lighting, CO2, fertilizing, or any other aquarium plant related question in the comments to this post, and I'll answer them in next week's edition.
Also, if you know an answer to a question posted, feel free to answer it! That way we can share information and experiences. Finally, I'm looking for a name for the series. I've tentatively picked Aquascaping Answers, but if you have any better ideas, leave a comment!
Wednesday, October 29, 2008
ADA International Aquatic Plants Layout Contest 2008: Top 10 Tanks
Here they are, the top 10 aquascapes in this year's ADA Aquatic Plants Layout Contest. Click on the images for a larger version. I must say, there are some absolutely stunning aquascapes in this bunch. Several are quite unique too, including position 1 and a really really long aquascape in position 7. I'll be posting some more tanks later. Enjoy!
 2nd
2nd
 3rd
3rd 4th
4th 5th
5th
 6th
6th
 7th
7th 8th
8th 9th
9th 10th
10th
1st
 2nd
2nd 3rd
3rd 4th
4th 5th
5th 6th
6th 7th
7th 8th
8th 9th
9th 10th
10th
Wednesday, October 01, 2008
Friday, August 29, 2008
AquaSketch Aquarium Planning Tool

I stumbled across this cool little tool today called AquaSketch and after playing around with it, figured it was worth sharing. It uses the Tropica plant paintings among other images to allow you to make a virtual 3D image of your aquarium. It takes a bit to get the hang of it, and the plants list is not by any means exhaustive, but the most common plants are included. The final result is rough, but very handy for giving you an idea of how a basic layout will look when completed. Just for fun, I made a model of my new aquarium. Even though you can only create rectangular aquariums and mine is a bowfront, you can get a decent idea of what it will look like. It has a glosso lawn on the left, with manzanita driftwood, crypts, rotala, and some moss on the right. Not too bad, eh? You can also save your layouts so people can view them in the original 3D format. Here's mine.
Wednesday, January 23, 2008
Planted Amano Aquarium: From Start to Finish
I stumbled upon this really useful article today that details the development of one of Takashi Amano's planted aquariums from start to finish with pictures. It's called "A Path to the Finished Aquarium." Although it doesn't start from the very beginning (including the setup of the tank), it shows how to trim stem plants to encourage bushy growth and how an aquascape grows and matures over the course of two months. Also helpful, it includes all information about the aquarium, including lighting type, strength, and duration and fertilization strategies. Here are the first few entries.
A week from planting. Although half of the tank water was changed daily, the water still looked somewhat cloudy. The growth of stem plants was still sparse.
15 days has passed since planting. The water has become clear. Glossostigma and Echinodorus tenellus have developed runners and Willow Moss on driftwood is growing steadily.
The first trimming on the 22nd day from planting. The stem plants planted at the same time to the same height were beginning to show a difference in their growth depending on their types. Trimming became necessary to keep their growth in balance.
Check out the rest of the entries and the detailed aquarium specifications in the article.
 May
May
31st, 2005 (7th day)
A week from planting. Although half of the tank water was changed daily, the water still looked somewhat cloudy. The growth of stem plants was still sparse.
 June
June
8th, 2005 (15th day)
15 days has passed since planting. The water has become clear. Glossostigma and Echinodorus tenellus have developed runners and Willow Moss on driftwood is growing steadily.
 June
June
15th, 2005 (22nd day)
The first trimming on the 22nd day from planting. The stem plants planted at the same time to the same height were beginning to show a difference in their growth depending on their types. Trimming became necessary to keep their growth in balance.
Check out the rest of the entries and the detailed aquarium specifications in the article.
Saturday, October 27, 2007
Creating a Waterfall Illusion Underwater
 I was curious as to how the tank above, which took World Ranking 7 in the ADA aquascaping contest this year, created the waterfall illusion. I had seen similar effects created by rising bubbles, but this seems to end before reaching the surface, meaning it is created using a different method (or there was a good deal of Photoshopping involved). However, an anonymous comment tipped me off to a website that explains exactly how it was created, and it is quite creative. To start off, the illusion is created with falling sand, not rising bubbles. However, bubbles still play an important role. See the diagram below:
 This is a cross section of the "waterfall." A tube and airstone blows bubbles up through a space behind the wall, and as a result, pulls water and tiny grains of sand (blue dots) from a sloped reservoir (sloped so that gravity pulls the sand down and into the bubble stream) up the narrow space. Once the grains reach a second opening, they forced out the second opening with the water current and fall back down the front of the wall back into the reservoir. Here's a picture of what this looks like before any plants are added:
 As you can see, very fine sand must be used for this to work. Additionally, where the sand falls is affected greatly by other currents in the tank, and it will inevitably fall outside of the reservoir. This means this effect is not the most practical for everyday use, as using it with a filter would probably blow the falling sand everywhere else in your tank. I'm sure much tweaking and adjusting is necessary to find the best type of sand suited for this application, and what size space behind the wall works best. How the sand is ejected from the top of the bubble column is also probably a problem area that requires a lot of attention and adjustment. It's hard to tell from the diagram, but the bubble column space most likely extends above the water line. This forces the water pulled up by the bubbles out the sand-ejection opening. Otherwise, the sand would continue to follow the current of bubbles and water up and out the top of the column (and you'd have a messy volcano effect instead of a waterfall!). The final effect, if done correctly, looks absolutely stunning in pictures.
Wednesday, July 25, 2007
Iwagumi Rock Placement Animations
Sorry about the broken links, the website (www.aquasaigon.org) seems to have disappeared. I'm trying to find the images elsewhere but not having much luck. Hopefully the website will be back up soon.
Sorry it's been a while since the last post, it's been a combination of a hectic personal life and running out of post ideas for the most part. I'm still looking for another worthy tank to analyze for an Aquascape Analysis so that should be up sometime before the end of the month.
For now, take a look at these animated images found on http://www.aquasaigon.org. They detail the different layers of rock used in an iwagumi aquascape:

 You'll also notice that the first stone placed is placed according to the Golden Rule of Aquascaping.
Sorry it's been a while since the last post, it's been a combination of a hectic personal life and running out of post ideas for the most part. I'm still looking for another worthy tank to analyze for an Aquascape Analysis so that should be up sometime before the end of the month.
For now, take a look at these animated images found on http://www.aquasaigon.org. They detail the different layers of rock used in an iwagumi aquascape:

 You'll also notice that the first stone placed is placed according to the Golden Rule of Aquascaping.
Wednesday, May 16, 2007
Aquascape Analysis #7: Sergio C.'s ADA 120P Aquarium
 Well I know it's been a long wait, but I've finally found a strikingly beautiful aquascape made by a fellow hobbyist that is truly worthy of examination. This aquarium is the work of Sergio C., who goes by SuRje1976 on both Aquatic Plant Central and the Planted Tank forums. It is an ADA 120P tank, meaning it is 120 cm long. As you can see, he went all out on top of the line equipment. But aside from the fancy glasswork, this is a great aquascape.
 The profile of this aquascape is an off-center V shape. This creates visually interesting height differences, and these sloping lines also help to guide the viewer's eyes. Even the hardscape seems to follow the profile, maintaining the relaxing lines of the aquascape.
  The main focal point (in red) is done by the book. It is perhaps the easiest way to create a focal point and one of the most effective ways. The red plant is also positioned perfectly according to the Golden Rule of aquascaping. The secondary focal point (in yellow) is also a product of the profile, and is located where the two sides of the V intersect. This small scene is perhaps one of the most interesting in the aquascape and is very pleasing to the eye.
  The flow follows the profile and hardscape of the tank as well, guiding the eyes from the main focal point to the secondary focal point. It is done in a way that is natural and relaxing and therefore gently guides the viewer's eyes.
  Finally, the foreground (green), midground (yellow), and background (blue), show more starkly the effects of the V shaped profile and how Sergio has used it to his advantage. Note the division created by the V is not a straight line through the background and foreground, but a more natural wandering line (red). The foreground here is entirely sand, which is becoming more and more popular, as many foreground plants require constant maintenance. The sand also adds contrast to the aquascape, highlighting the plants behind.
Sergio's aquascape is a classic design with clear inspirations from Takashi Amano that blends all the tenets of the nature aquarium style. The result is a wonderful aquarium that is pleasing to look at and a work of art. For more information on Sergio's tank and his many DIY projects, check out his journal.
Monday, January 22, 2007
Aquascape Analysis #5: ADA Tank 35

This week's Aquascape Analysis is ADA Tank 35 from the ADA Thailand website. This is a beautiful tank with a mossy foreground, tall busy background plants, and a great sense of depth.

If we take a look at the profile, we can see fairly easily that this is a "V" shaped aquascape. In fact, the plants on either side nearly reach the surface of the aquarium. The deep drop in the middle combined with the gradually shorter plants towards the middle create a sense of perspective as well, creating depth.

The focal point of this aquarium is the only red plant in the aquascape, off-center in the background. Since it is the only red plant in the aquascape, it draws the viewer's gaze immediately. A red plant among green is often the easiest way to create a focal point. There are several secondary focal points as well, with the bright green plants on the right and left dominating. However, the small anubias in the midground also serve as a secondary focal point due to the contrast in leaf shape, size, and color against the moss and a dark background.

As for the flow of this aquascape, it tends to originate from the focal point (as in most Amano style aquascapes). It then moves towards the left side of the tank. This is the dominant side of the tank, despite the brightness of the right. It's the depth and contrast of textures on the left side that draws the viewer's gaze. The viewer's gaze then either returns to the focal point or moves to the right side, directed by the moss covered driftwood. A large part of the right side is also dark, adding to the submissive role this side plays in the overall aquascape.

As for the foreground (green), midground (yellow), and background (blue), the foreground is clearly almost entirely moss. This aquascape makes use of moss as a ground cover and it helps at a messy, wild feeling to the aquarium (without actually being too messy or wild, almost a controlled chaos). The midground makes up the bulk of the right side and most of the moss covered driftwood. I included the right side in the midground because I feel that due to a lack of depth, the right side almost feels like it is right up to the glass (and it is to some extent, note the large dark space in the bottom right). The background makes up the remaining part of the tank, including the focal point and some of the plants from the right hand side that are further towards the back of the tank.
The major lesson that can be learned from this aquascape is that the use of depth can affect the flow and composition of the aquascape greatly. By using depth on the right hand side, the aquascape draws the viewer's gaze to this side. The right side is much closer to the viewer, and is thus not as comfortable to look at compared to the left side. Perspective and depth can also be forced in smaller tanks by placing plants in a gradually descending row. This effect has to be fine tuned, but if used correctly, can add depth to even the smallest tanks.
Monday, January 01, 2007
Aquascape Analysis #3: Amano's "Dance of the Angels"

For this week's Aquascape Analysis, I've decided to analyze Takashi Amano's aquarium "Dance of the Angels" from his book Nature Aquarium World Book 3. This is a very large aquarium (2590L or 673 Gallons!) that is designed to be viewed from both sides. I wasn't able to find a picture of the other side of the aquarium, so just understand that this is a particularly wide aquarium and has an entire other aquascape on the other side. The advantage of having such as large aquarium is you can use larger plants like Cyperus helferi and let them grow to full size. This aquascape can be imitated in a smaller aquarium though, simply by substituting larger plants like the C. helferi with smaller plants, like Blyxa japonica or Echinodorus tenellus.

First, we can see that the profile is partly obscured by the top of the photograph (or aquarium) but it has overall a sloping profile, meaning it starts lower on one side of the aquarium and slopes upwards to the opposite side. The viewer's gaze will be automatically drawn down this slope, and it also prevents a "wall of plants" effect. There is a slight "V" effect in the profile as well that helps to draw the viewer's attention towards the back of the aquarium between the C. helferi and Java Fern plants.

The focal point is somewhat hard to distinguish because of the angel fish, which obviously draw the viewer's gaze first. However, in real life, the fish wouldn't stay stationary and although they form the focal point in this photograph, the overall focal point of the aquascape is the central C. helferi plant. There are also several secondary focal points around the aquarium as well, including the C. helferi plant on the right side, the bright spot in the background, the highlighted Glossostigma elatinoides in the foreground, and of course, the fish.

Amano has cleverly placed the secondary focal points to draw the viewer's gaze around the aquarium without using obvious driftwood or rocks. If we look at the flow of this aquascape, it is largely determined by the secondary focal points. These have been purposely placed (or patiently waited for in regard to the fish!) strategically around the aquarium.

Finally, if we look at the composition of the aquascape we can see that the foreground (red) is comprised of the G. elatinoides, while the midground (yellow) is made up of two islands of C. helferi and Java fern on the right side of the aquarium. The background (green) takes up almost the entire top left corner. This composition almost pushes the viewer to the right side of the aquarium and up the G. elatinoides carpeted pathway between the gently swaying C. helferi leaves and deeper into this beautiful aquascape.
Thursday, November 16, 2006
The Golden Rule of Aquascaping
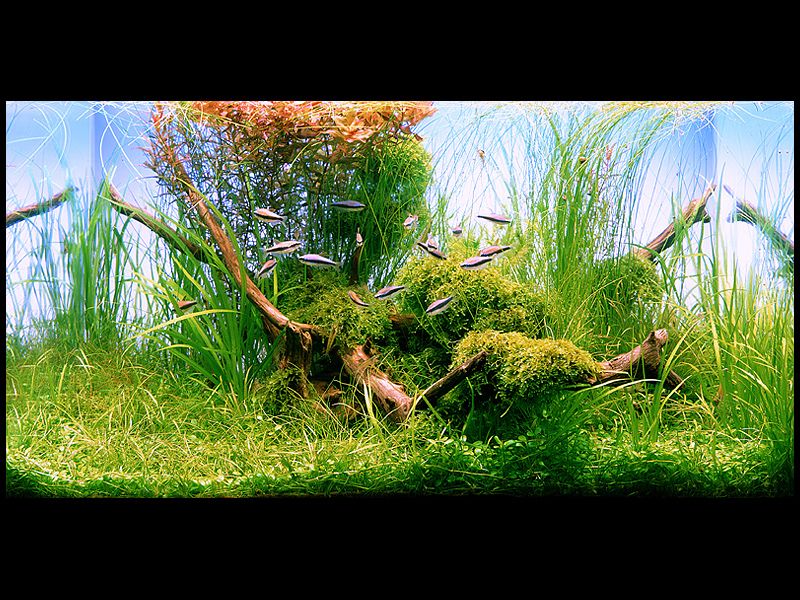 This is the first in a series of posts about the fundamentals of aquascaping. I'm posting these because I've found them very helpful in creating an aesthetically pleasing aquascape. They are by no means the "rules" of aquascaping, just guides.
 When you're planning out an aquascape, one of the most important aspects is where it will draw the viewer's gaze. In fact, a viewer's gaze is what the aquascape is all about. The primary goal of an aquascape is to be pleasing, relaxing, and interesting to look at for the viewer. In order to do so, you need to set a sort of "anchor" for the mind. This is called the focal point. It is the point that draws the gaze of the viewer first, from which they can explore the rest of the tank. A focal point can consist of almost anything, from a red leaved plant to a rock or a piece of driftwood. The only thing it must do is draw attention. You can't have a plant that blends in with every other plant be the focal point, you have to make it stand out in some way. There are a few simple things to remember about a focal point.
First, there should only be one. Having more than one focal point leaves the mind uncomfortable and stressed, looking back and forth from focal point to focal point. Only in extremely large tanks may you have two focal points comfortably. Second, you should have some sort of focal point in every aquascape. Not having any does the same as having too many: the viewer's eyes are left wandering back and forth, stressed and uncomfortable. Third, the focal point should be placed in a very particular (and special!) location. This is where we come to the Golden Rule of aquscaping. This Golden Rule dates all the way back to the Greeks. It seems the they came up with a theory that the ratio 1:1.618 was the most pleasing to the human eye. Many people assume that plopping the focal point in the middle is most pleasing, however, this will again keep your eyes wandering left and right. By placing it slightly off center, you are effectively gently guiding the viewer's eyes. You'll see this Golden Rule used in all forms of art, from paintings to architecture. But how do you use this Golden Rule in the aquarium?
It's actually fairly easy. All you need is a measuring tape (or ruler) and a calculator. Simply measure your tank lengthwise from one end to the other. Then divide that number by 2.618. A 29 gallon tank, as an example, is 30 inches wide. 30 divided by 2.618 is 11.45 inches. Now take your measuring tape again and measure 11.45 inches from one side of the tank (you can measure from either side, but which side to put the focal point on is up to you). At exactly 11.45 inches exists an imaginary line. This is where your focal point should be centered.
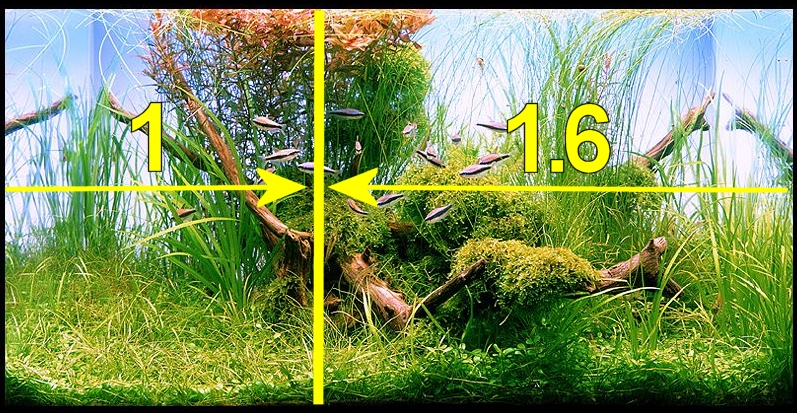
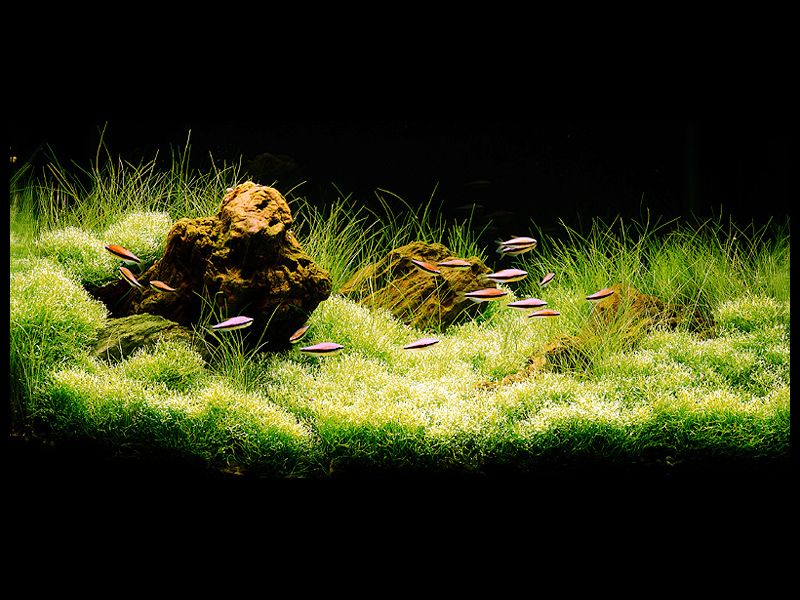
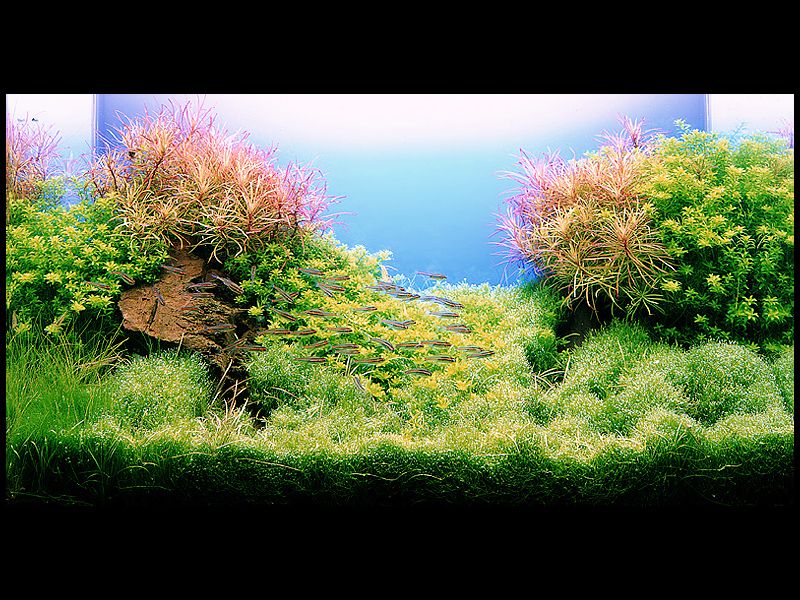
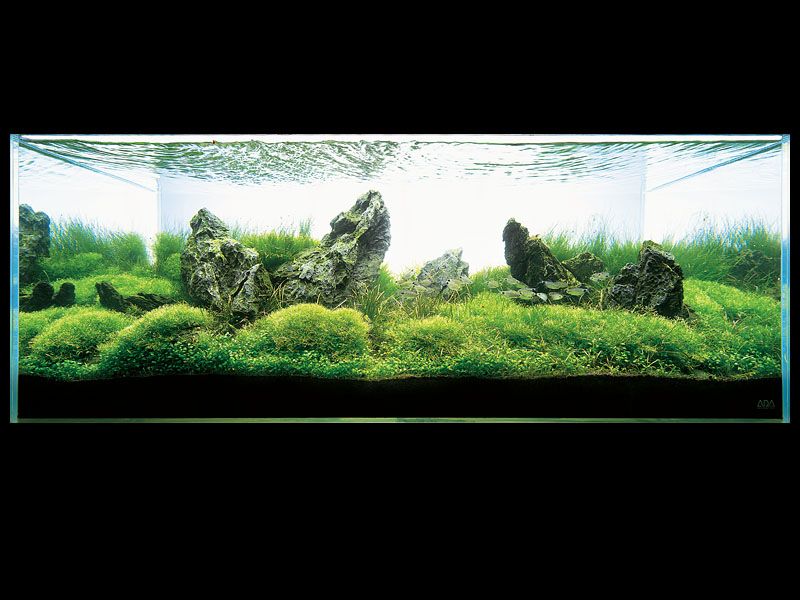
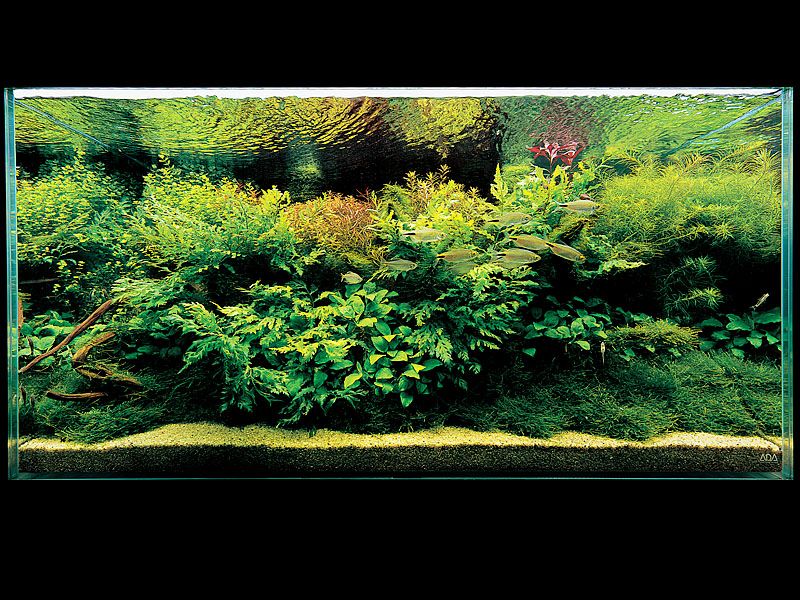
The picture above shows an example of how Takashi Amano has used the Golden Rule in his aquascape. As you can see, he has placed a red, tall pant right at the Golden Rule, creating an effective, pleasing focal point. Take a look at the following aquascapes by Amano and see if you can find the focal point and the use of the Golden Rule:
Subscribe to:
Posts (Atom)
Popular Posts
-
 I was curious as to how the tank above, which took World Ranking 7 in the ADA aquascaping contest this year , created the waterfall illusion...
 -
 When it comes to combating algae in the aquarium, balancing nutrients and water quality will only take you so far. The most powerful tool in...
 -
The second most difficult part about adding a yeast-powered CO2 system to your planted aquarium, after ripping all your hair out trying to f...
-
For those of you starting out in the world of planted aquariums, I've picked my top three mistakes I've seen people make when starti...


Sponsors

