From one aquascaper to another, this thing is amazing.
I've tried all kinds of CO2 diffusers before, from just sticking the CO2 tube into my Eheim filter intake, to ceramic disc diffusors in the tank, to a dedicated powerhead "bubble-basher." All had some drawbacks, whether it was incomplete diffusion, noise, or having to have something ugly in the tank.
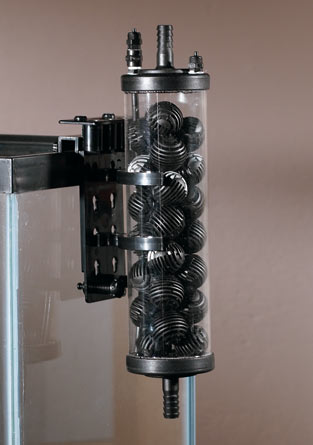
This Waterplant diffuser is an inline diffuser though, so it goes in the outlet or inlet tube of a canister filter. The principle is the same as a ceramic diffuser, but it doesn't need to clutter up the inside of your tank. Just pop the diffuser on and tiny CO2 bubbles are pushed through the ceramic cylinder into the water flow. Nothing to clean, nothing to replace. It's efficient, quiet, and clutter-free. It's also plastic, so there's no glass to accidentally break, and it fits multiple tube sizes.
I have mine on my outlet tubing, only because I feel like putting it on the intake would probably lead to "burping" of the filter still. The diffuser does come with an intake screen though, and is ready to be put on the end of a filter intake directly in the tank.
There are some important things to remember with it though. One is, you absolutely must have a check valve installed in your CO2 line. Because the ceramic diffuser works both ways, water can be forced into the diffuser and up the CO2 tube if your pressure gets low or it shuts off overnight.
For $24, I'm very happy I don't have to fuss with suction cups, have ugly tubing in my tank, or listen to my filter "burp" all the time.
Showing posts with label CO2. Show all posts
Thursday, February 24, 2011
Sunday, February 08, 2009
Top Common CO2 Drainers in the Aquarium

So you've got your CO2 system all set up, whether it's DIY yeast powered, or pressurized, and you've even got your CO2 diffusing method set up and working great. But something's wrong. Your plants aren't growing faster, the algae is still there, and your pH isn't dropping. You check and double check your equipment and make sure there are no leaks anywhere and that CO2 is flowing fine. Chances are, all that CO2 you're pumping into your aquarium is being vented off into the atmosphere. What's the culprit? Here are the most common causes:
- Hang-on-back (HOB) Filters - There's a reason these filters aren't used often with high tech planted aquariums. All that water agitation involved with sucking it up and then churning it through filter media and dumping it back into the tank is sure to vent most if not all of your CO2. Try a canister or internal filter instead.
- Airstones - There should be no reason to have an airstone in your planted tank. The plants take care of providing any oxygen needed for fish. Using one with a high tech planted tank is sure to lower your CO2 levels. Unless this is intended (i.e. as an emergency measure when CO2 gets too high), take out the airstone! This also goes for all air pump powered figurines, etc. But if you're reading this blog you probably threw those out years ago anyway. If you haven't yet, please do, before you give Takashi Amano a heart attack!
- Powerhead/filter outlets - If you place powerheads or filter outlets too close to the surface of the water, they'll create turbulence which will vent CO2. Place all spraybars, filter outlets, and powerhead outlets a safe distance under the surface so you don't see too many ripples (if any at all).
Friday, January 02, 2009
Video: How to Set Up a Pressurized CO2 System
Setting up a pressurized CO2 system for the first time can be a bit daunting. For any of you that were lucky enough to get a pressurized CO2 system for the holidays, I came across this excellent video on how to set up a pressurized CO2 system from Green Leaf Aquariums which goes through all the basic steps. Although regulators may vary, the basic steps in the video will be the same for most systems (for example, not all regulators need the working pressure adjusted). Just be sure not to screw on the bubble counter cap too tightly, or you may crack the plastic (as I did, and woke up to a puddle on the floor under the tank!).
Thursday, October 26, 2006
Methods of Diffusing CO2 in the Aquarium
In order to have any effect on plant growth, CO2 gas must be dissolved into the water of your aquarium. Just letting it bubble out of a tube from your DIY Yeast CO2 generator or CO2 tank will have little to no effect on CO2 levels in the tank, especially if you're using a yeast generator (see the DIY yeast CO2 recipe). This is because larger bubbles don't dissolve as quickly as smaller bubbles. So the ultimate goal of diffusing CO2 into an aquarium is to make the smallest bubbles possible, and them keep them from reaching the surface for as long as possible. You need a reactor, or a device that breaks up the large bubbles into smaller bubbles and mixes it with the aquarium water. Below are the most popular methods for diffusing CO2 in the aquarium:
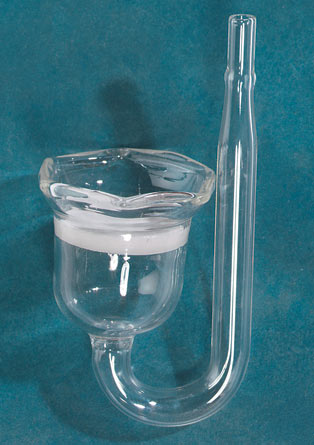
Bell - (very low efficiency) About the most low-tech way of dissolving CO2 is by using a bell-shaped (or any shape as long as it holds gas) container turned upside-down in your tank. The CO2 tubing is placed underneath the bell and the CO2 bubbles rise up and collect inside the upside-down container. The CO2 dissolves passively and very very slowly. This will give you almost no CO2 concentration in your aquarium just because you can't run the CO2 faster than it dissolves and it dissolves so slowly, plants probably use up the CO2 as soon as it dissolves. One way to make it moderately more efficient is to aim a powerhead or filter exhaust across the bottom of the bell (the open end). This diffusor can be made quite easily at home.
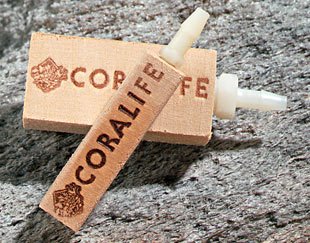
Airstone - (very low efficiency) This is probably the second least efficient way of dissolving CO2 in your aquarium, but with a little ingenuity it can be made more effective. Try to get the airstones that create the finest bubbles. Limewood airstones are best, but they clog fairly quickly. These make fairly small bubbles, but to be really effective you have to keep the bubbles from racing up to the surface and escaping. Try to position the airstone as deep as possible. You can also put the airstone under the intake or exhaust of a filter or powerhead to trap the bubbles and send them with the current, thus keeping them in the water for longer and increasing the efficiency.
Glass Diffusor - (low to medium efficiency) One of the most popular methods due to its ease and low cost, it is slightly better than a regular airstone, although it is basically the same principle. A ceramic disk emits fine bubbles, finer than an airstone. However, this disk can collect dirt and debris and become clogged with algae, creating much larger bubbles and reducing its efficiency. A soak in bleach will help to clear the blockages. Again, try to position the glass diffusor as deep as possible in the tank. It can also be made much more efficient by placing it under the intake or exhaust for a filter or powerhead. Glass diffusors often need higher pressure to work and they may not work well or work at all with DIY yeast CO2 systems.
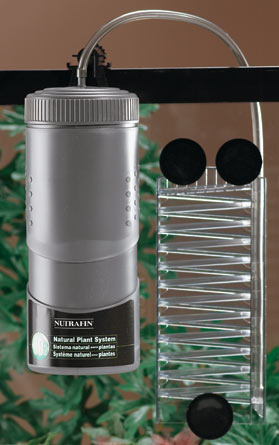
Bubble Ladder - (low to medium efficiency) This is another inexpensive, simple option which consists of a series of zig-zagged ramps or a twisted ramp placed on upright on the side of the aquarium. CO2 enters from the bottom and the bubble is forced to travel along these ramps to reach the surface. Meanwhile, the movement helps to dissolve the bubble. These work by extending the amount of time the bubble takes to reach the surface, thus giving it more time to dissolve. However, the bubble is rarely completely dissolved by the time it reaches the end of the ramp and is allowed to escape to the surface. The downside to these is that they are often big, bulky, and ugly and there is no real way to hide them.
Filter or Powerhead Intake - (medium to high efficiency) Perhaps the easiest high efficiency option is using a filter or powerhead as a reactor. All you need to do is put the CO2 tube into the intake of either a canister filter or powerhead. The motor will suck up the bubbles which will be either immediately pulverized by the impeller (powerhead) or drawn through the filter media, dissolving rapidly along the way due to the high flow, and then into the impeller (canister filter). Most ot the time when using a canister filter, you won't even see the bubbles coming out of the exhaust as almost all of the CO2 is dissolved. A powerhead is a little less efficient, as it just spews the fine bubbles into the tank and some of these rise to the surface and escape, but not before taken on a wild ride around your aquarium. Depending on the filter or powerhead, the CO2 bubbles can make a fairly loud ticking or whooshing sound as they are met by the impeller blades, and some aquarists may find this too annoying.
In-line Reactor/Counter-flow Reactor - (high to very high) These can be DIY or bought, but tend to be quite expensive to buy or labor intensive to make. However, they can't be beat in terms of efficiency if they are working correctly (another issue if you build it yourself). It's basically a chamber connected to the exhaust of a canister filter or powerhead placed vertically. The lower end of the chamber is often left open or covered with a sponge, unless it is an in-line design, where the bottom is connected to tubing that returns to the tank. The CO2 is released into the chamber, and as it tries to rise to the surface, it is pushed back by the flow of water. Even if it makes it to the top of the chamber, it has nowhere to go but back into the flow of water (the top of these chambers is often shaped like a funnel to force the bubbles back into the flow). To make it more effective, bio-balls or other oddly shaped filter media can be put inside to help break up the CO2 bubbles as they are tossed around. The biggest problem with these reactors is that since they don't have any effective means of breaking up the larger bubbles, if too much CO2 is pumped in and the flow isn't strong enough, the bubbles collect and form larger bubbles which dissolve much slower. So balancing the flow of the water and the flow of CO2 is critical to achieving optimal diffusion.
Bell - (very low efficiency) About the most low-tech way of dissolving CO2 is by using a bell-shaped (or any shape as long as it holds gas) container turned upside-down in your tank. The CO2 tubing is placed underneath the bell and the CO2 bubbles rise up and collect inside the upside-down container. The CO2 dissolves passively and very very slowly. This will give you almost no CO2 concentration in your aquarium just because you can't run the CO2 faster than it dissolves and it dissolves so slowly, plants probably use up the CO2 as soon as it dissolves. One way to make it moderately more efficient is to aim a powerhead or filter exhaust across the bottom of the bell (the open end). This diffusor can be made quite easily at home.
Airstone - (very low efficiency) This is probably the second least efficient way of dissolving CO2 in your aquarium, but with a little ingenuity it can be made more effective. Try to get the airstones that create the finest bubbles. Limewood airstones are best, but they clog fairly quickly. These make fairly small bubbles, but to be really effective you have to keep the bubbles from racing up to the surface and escaping. Try to position the airstone as deep as possible. You can also put the airstone under the intake or exhaust of a filter or powerhead to trap the bubbles and send them with the current, thus keeping them in the water for longer and increasing the efficiency.
Glass Diffusor - (low to medium efficiency) One of the most popular methods due to its ease and low cost, it is slightly better than a regular airstone, although it is basically the same principle. A ceramic disk emits fine bubbles, finer than an airstone. However, this disk can collect dirt and debris and become clogged with algae, creating much larger bubbles and reducing its efficiency. A soak in bleach will help to clear the blockages. Again, try to position the glass diffusor as deep as possible in the tank. It can also be made much more efficient by placing it under the intake or exhaust for a filter or powerhead. Glass diffusors often need higher pressure to work and they may not work well or work at all with DIY yeast CO2 systems.
Bubble Ladder - (low to medium efficiency) This is another inexpensive, simple option which consists of a series of zig-zagged ramps or a twisted ramp placed on upright on the side of the aquarium. CO2 enters from the bottom and the bubble is forced to travel along these ramps to reach the surface. Meanwhile, the movement helps to dissolve the bubble. These work by extending the amount of time the bubble takes to reach the surface, thus giving it more time to dissolve. However, the bubble is rarely completely dissolved by the time it reaches the end of the ramp and is allowed to escape to the surface. The downside to these is that they are often big, bulky, and ugly and there is no real way to hide them.
Filter or Powerhead Intake - (medium to high efficiency) Perhaps the easiest high efficiency option is using a filter or powerhead as a reactor. All you need to do is put the CO2 tube into the intake of either a canister filter or powerhead. The motor will suck up the bubbles which will be either immediately pulverized by the impeller (powerhead) or drawn through the filter media, dissolving rapidly along the way due to the high flow, and then into the impeller (canister filter). Most ot the time when using a canister filter, you won't even see the bubbles coming out of the exhaust as almost all of the CO2 is dissolved. A powerhead is a little less efficient, as it just spews the fine bubbles into the tank and some of these rise to the surface and escape, but not before taken on a wild ride around your aquarium. Depending on the filter or powerhead, the CO2 bubbles can make a fairly loud ticking or whooshing sound as they are met by the impeller blades, and some aquarists may find this too annoying.
In-line Reactor/Counter-flow Reactor - (high to very high) These can be DIY or bought, but tend to be quite expensive to buy or labor intensive to make. However, they can't be beat in terms of efficiency if they are working correctly (another issue if you build it yourself). It's basically a chamber connected to the exhaust of a canister filter or powerhead placed vertically. The lower end of the chamber is often left open or covered with a sponge, unless it is an in-line design, where the bottom is connected to tubing that returns to the tank. The CO2 is released into the chamber, and as it tries to rise to the surface, it is pushed back by the flow of water. Even if it makes it to the top of the chamber, it has nowhere to go but back into the flow of water (the top of these chambers is often shaped like a funnel to force the bubbles back into the flow). To make it more effective, bio-balls or other oddly shaped filter media can be put inside to help break up the CO2 bubbles as they are tossed around. The biggest problem with these reactors is that since they don't have any effective means of breaking up the larger bubbles, if too much CO2 is pumped in and the flow isn't strong enough, the bubbles collect and form larger bubbles which dissolve much slower. So balancing the flow of the water and the flow of CO2 is critical to achieving optimal diffusion.
Wednesday, October 25, 2006
Build Your Own Yeast CO2 Generator
The easiest way to provide your planted aquarium with CO2 gas (a vital fertilizer) is to make your own yeast powered CO2 generator. This can be done very easily and inexpensively (all you need to buy is tubing and the supplies for the yeast recipe). Below are the tools and supplies required:

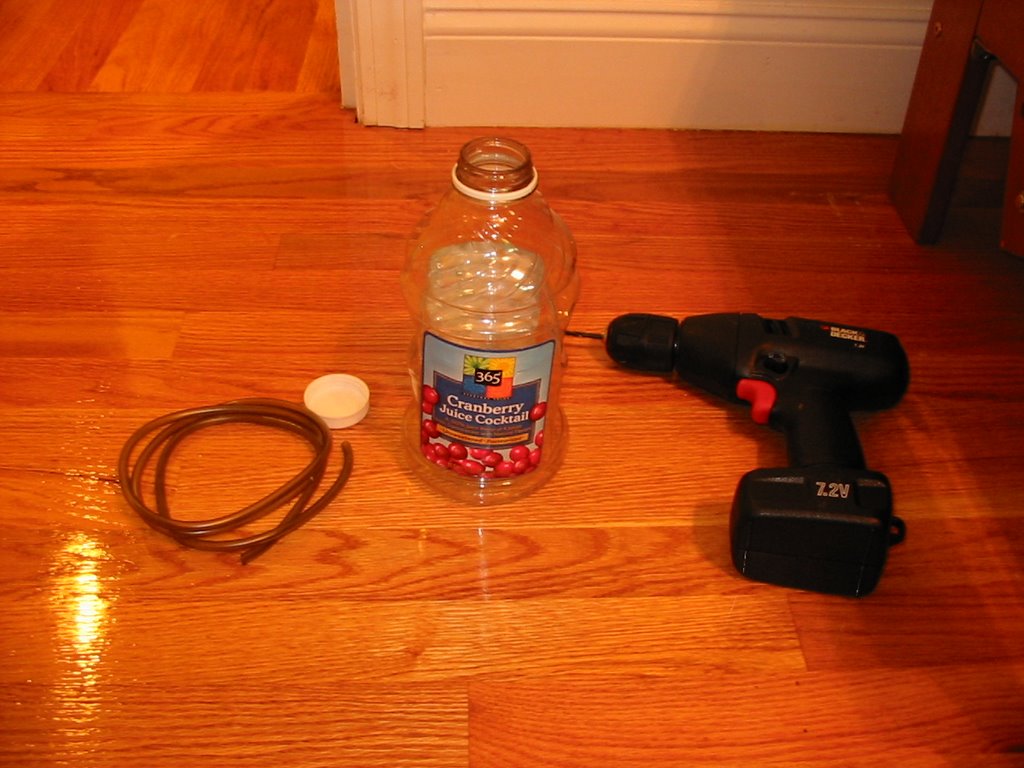
Any juice container will work, or any container with a tight fitting lid for that matter. However, some containers work better than others. I've always had good results with juice containers whereas some of the othe containers I've tried (like the big iced tea jugs) don't make an airtight seal when closed. You can use any size, however 48-64 ounce containers are a good size. They fit the 2 cups sugar called for in most recipes and don't take up a huge amount of space. The bigger the generator, the more water there is which dilutes the alcohol byproduct that eventually kills the yeast, so larger containers will last longer as long as you add the same amount of ingredients. The tubing can be any kind of airline tubing, however standard airline tubing will eventually go hard and crack from exposure to CO2. Using silicone or CO2 resistant tubing is best. A drill is nice, but if you don't have one, the same result can be acheived with a nail or screw.
Step 1
The Final Product: A DIY Yeast Generator

Any juice container will work, or any container with a tight fitting lid for that matter. However, some containers work better than others. I've always had good results with juice containers whereas some of the othe containers I've tried (like the big iced tea jugs) don't make an airtight seal when closed. You can use any size, however 48-64 ounce containers are a good size. They fit the 2 cups sugar called for in most recipes and don't take up a huge amount of space. The bigger the generator, the more water there is which dilutes the alcohol byproduct that eventually kills the yeast, so larger containers will last longer as long as you add the same amount of ingredients. The tubing can be any kind of airline tubing, however standard airline tubing will eventually go hard and crack from exposure to CO2. Using silicone or CO2 resistant tubing is best. A drill is nice, but if you don't have one, the same result can be acheived with a nail or screw.
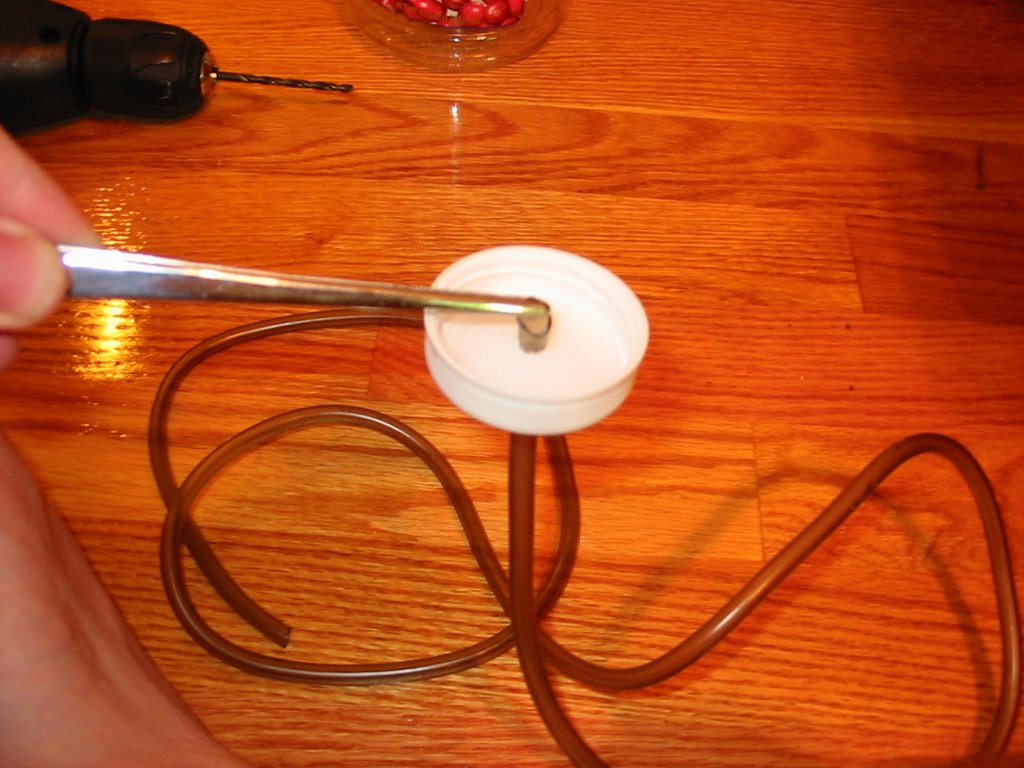
Step 1Drill a hole in the lid smaller than the diameter of the tubing, but large enough so you think you'll be able to squeeze it through. I use a smaller drill bit and then widen the hole with a pair of aquarium tweezers. Remember you can only make the hole larger, so don't get overzealous.
Cut the end of the tubing on a diagonal and push it through the hole in the lid as shown, using tweezers or pliers to grab it on the other side and pull it through. If it doesn't seem to fit, make your hole bigger. If you don't need pliers or tweezers, the hole is too big and CO2 will leak out. If this happens, you need a new container (or at least a new lid). Pull it through only a half an inch or less.
This is the finished cap and tubing. The seal should be tight enough to prevent leakage. There is no need for glue or silicone if it is done right. Just screw the lid on and you're ready to mix up your yeast solution!
The Final Product: A DIY Yeast GeneratorThere are a few important things to remember about DIY yeast generators.
- First, they are under pressure. Although it is highly unlikely they will burst, it does happen if the tubing gets clogged. Make sure the gas has a clear path to your tank. Some people add a check-valve between the tank and the generator to prevent yeast bubbles and goo from going up the tubing. Personally I've never had this happen and adding a check valve only makes another possible leakage point. As long as you don't overfill or shake up your mixture, it shouldn't get into the tubing.
- Also remember that if you squeeze the bottle (even gently), once you release it, it will suck up aquarium water. This can form a siphon and once it does, aquarium water will flood your generator. This will ruin the reaction (other bacteria and organisms in the water will out-compete the yeast) and can make a big mess. So be careful and set the generator down before screwing on the lid and connecting it to the tank.
- Finally, a DIY yeast generator is a rather low powered CO2 generator, so diffusing all that CO2 most effectively and stopping leaks is paramount. One leak can make the whole thing not work. A cheap idea for diffusing the CO2 in the tank (called a reactor) is to put the tubing from the generator into the input of a powerhead or canister filter. The impeller will suck up and pulverize the CO2 bubbles, creating a fine mist that will dissolve much faster. Look for an article soon on the different type of CO2 reactors!
Thursday, September 21, 2006
DIY CO2 Recipe: Duration vs. Intensity
The second most difficult part about adding a yeast-powered CO2 system to your planted aquarium, after ripping all your hair out trying to find where its leaking (see our article on building your own CO2 generator for step by step instructions on how to avoid this), is to find a recipe that fits your CO2 needs. You can find all kinds of recipes and resources online that tell you to boil containers, add baking soda, use honey, brown sugar, and all sorts of other crazy things. Take it from me: I've tried these and I still keep coming back to a basic recipe and procedure. The main thing to remember is that depending on what proportion you add the ingredients, you will either get very intense CO2 production for a short period of time, or milder CO2 production for a longer period of time. If you add more sugar and yeast, the CO2 production will be more intense, while adding less of both means it will last longer. This is because as yeast create CO2, they produce alcohol which eventually poisons the yeast and kills it. A smaller amount of sugar and yeast means the whole process is slowed down and lasts much longer. I opt for this type of mix, only because I find it a pain to replace the mixes every week, let alone every few days! My recipe usually produces CO2 at a fairly regular rate for about 14 days. It will continue to produce CO2 for at least another week or so, but it will produce less and less each day. This recipe works well in containers of roughly 2 liters (soda bottles, juice containers):
Ingredients:
2 cups sugar
1 tsp baking soda
1/2 tsp yeast (regular dry baker's yeast is fine, see picture)
- Start with a small cup or bowl and add a small amount of lukewarm water and a pinch or two of sugar. Mix in the yeast with a fork, stirring vigorously until the water is bubbly. This will help to "activate" dry yeast by adding oxygen, preventing mass die-offs that occur if you just dump the yeast into the water. Let this sit while you prepare the container, or for at least 10 minutes, and stir every few minutes to keep the water oxygenated.
- Rinse out your container if you have used it before to remove all traces of alcohol. Fill it about 2/3 of the way with lukewarm water. Tap water is fine.
- Using a funnel, add the 2 cups sugar and the baking soda to the water in the container. If you've used the container before, it's likely you don't have a lid you can use to close it up and shake it, so just put the palm of your hand over the opening and turn it upside down over the sink and shake it gently, making sure to keep the seal with your hand. The point is just to dissolve most of the sugar in the water (otherwise it will just sit on the bottom). If you haven't used the container yet, wait to drill a hole in the lid till after you've shaken it up, just to save yourself a sticky hand.
- If it's been about 10 minutes or longer, pour the yeast and water mixture into the container using a funnel. No need to mix it up, just put the lid on and it should start producing CO2 in anywhere from a few hours (I've had it start in around 1 hour!) to 12 hours depending on how well you activated the yeast.
Subscribe to:
Posts (Atom)
Popular Posts
-
I was curious as to how the tank above, which took World Ranking 7 in the ADA aquascaping contest this year , created the waterfall illusion...
-
When it comes to combating algae in the aquarium, balancing nutrients and water quality will only take you so far. The most powerful tool in...
-
The second most difficult part about adding a yeast-powered CO2 system to your planted aquarium, after ripping all your hair out trying to f...
-
For those of you starting out in the world of planted aquariums, I've picked my top three mistakes I've seen people make when starti...