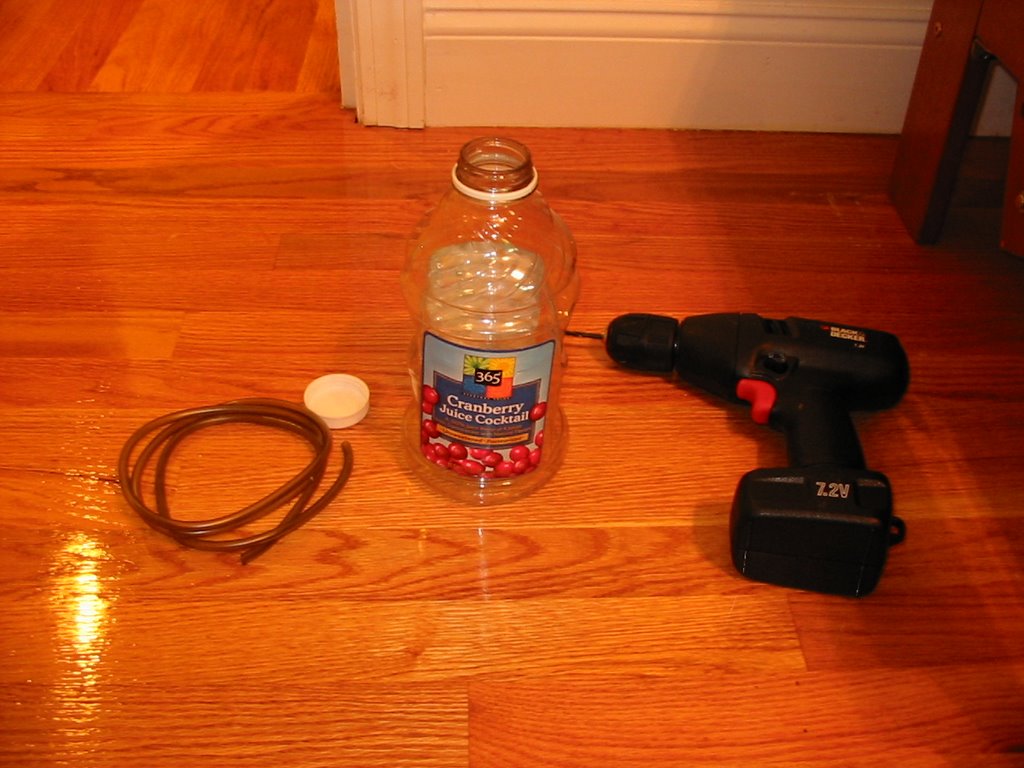
Any juice container will work, or any container with a tight fitting lid for that matter. However, some containers work better than others. I've always had good results with juice containers whereas some of the othe containers I've tried (like the big iced tea jugs) don't make an airtight seal when closed. You can use any size, however 48-64 ounce containers are a good size. They fit the 2 cups sugar called for in most recipes and don't take up a huge amount of space. The bigger the generator, the more water there is which dilutes the alcohol byproduct that eventually kills the yeast, so larger containers will last longer as long as you add the same amount of ingredients. The tubing can be any kind of airline tubing, however standard airline tubing will eventually go hard and crack from exposure to CO2. Using silicone or CO2 resistant tubing is best. A drill is nice, but if you don't have one, the same result can be acheived with a nail or screw.
 Step 1
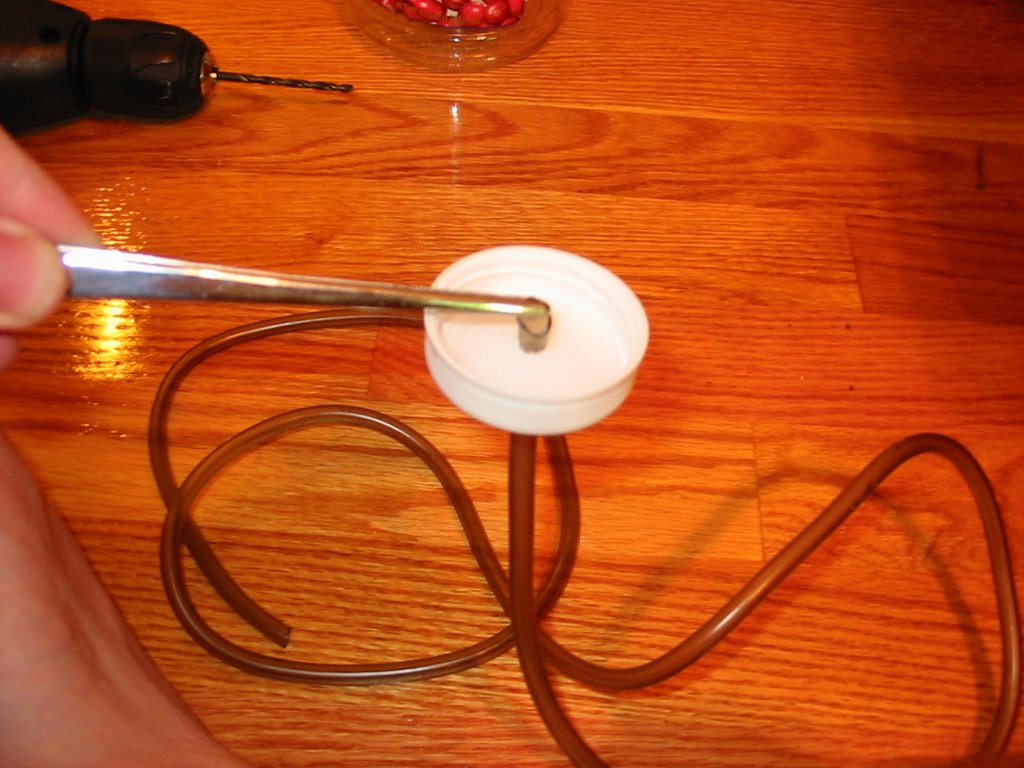
Drill a hole in the lid smaller than the diameter of the tubing, but large enough so you think you'll be able to squeeze it through. I use a smaller drill bit and then widen the hole with a pair of aquarium tweezers. Remember you can only make the hole larger, so don't get overzealous.
 Step 2
Cut the end of the tubing on a diagonal and push it through the hole in the lid as shown, using tweezers or pliers to grab it on the other side and pull it through. If it doesn't seem to fit, make your hole bigger. If you don't need pliers or tweezers, the hole is too big and CO2 will leak out. If this happens, you need a new container (or at least a new lid). Pull it through only a half an inch or less.
 Step 3
This is the finished cap and tubing. The seal should be tight enough to prevent leakage. There is no need for glue or silicone if it is done right. Just screw the lid on and you're ready to mix up your yeast solution!
 The Final Product: A DIY Yeast Generator
There are a few important things to remember about DIY yeast generators.
- First, they are under pressure. Although it is highly unlikely they will burst, it does happen if the tubing gets clogged. Make sure the gas has a clear path to your tank. Some people add a check-valve between the tank and the generator to prevent yeast bubbles and goo from going up the tubing. Personally I've never had this happen and adding a check valve only makes another possible leakage point. As long as you don't overfill or shake up your mixture, it shouldn't get into the tubing.
- Also remember that if you squeeze the bottle (even gently), once you release it, it will suck up aquarium water. This can form a siphon and once it does, aquarium water will flood your generator. This will ruin the reaction (other bacteria and organisms in the water will out-compete the yeast) and can make a big mess. So be careful and set the generator down before screwing on the lid and connecting it to the tank.
- Finally, a DIY yeast generator is a rather low powered CO2 generator, so diffusing all that CO2 most effectively and stopping leaks is paramount. One leak can make the whole thing not work. A cheap idea for diffusing the CO2 in the tank (called a reactor) is to put the tubing from the generator into the input of a powerhead or canister filter. The impeller will suck up and pulverize the CO2 bubbles, creating a fine mist that will dissolve much faster. Look for an article soon on the different type of CO2 reactors!


Unfortunately, no, there is no way of controlling the amount of CO2 short of altering the mixture (less yeast means less CO2) or adding some surface aggitation to release some of the gas (like an airstone or filter outlet). To get precise control, you'd have to go with pressurized CO2. Whatever you do, don't limit the flow of CO2 with a valve or by other means as it is asking for an explosion of yeasty goo!
ReplyDeleteI use 2 bottles. I change one a week. You will get a more even CO2 flow over the course of time this way. It also will increase the total amount of CO2 you can out in you tank. I use a bread bag tab to remind me which one I changed last.
ReplyDeleteI had the PH problem too. Frequent ater changes will help keep the PH up. I ended up forcibly raising my KH (which controls the range your PH will fall in) by adding a small handful of crushed coral for a salt water tank into the canister filter as part of the filter medium. The low PH will dissolve some of the coral, raising the KH and thus the PH. It should kinda balance out, the PH really drops, the water is more acidic and will dissolve the coral faster. If you stop doing the CO2 injection though, your PH will shoot up to 8 or 9 though, so it is a double edged sword.
HI,I use a second bottle half filled with tap water. It is conected to the Co2 Reactor and to the Acuarium. It work as a "Wet filter" preventing a "accident"....Such a Yeast mixture going to the acuarium, the stone (if you use one) is not get pluged. Also work as a bubble counter...
ReplyDeleteRegards
I hope no one gets upset about my posting this. It's intended to be helpful, rather than a hijack of the thread. :)
ReplyDeleteThank you for the great info.!!! I found your site as the result of looking for info. on DIT CO2 tick traps; since, ticks are attracted by CO2. I plan to use this with a plastic box over the bottle, with holes along the bottom of it and glue boards around the base, near those holes. As many diseases as ticks can carry, I thought it a shame that most people searching for information on how to build CO2tick traps would never find this site. Perhaps by leaving this post, your page will start coming up when folks do a search for CO2 tick traps. :) Perhaps it might even give some of the site regulars an idea for a second use for these CO2 generators.
If I follow your instructions to a tee, do I understand I can use an airstone at the end that goes into my aquarium? Will a larger airstone allow more co2 to be released in the tank and a smaller one release less?
ReplyDeleteThis is all new territory for a 75+ female . Am I crazy to attempt this Than You.
Using an airstone will work, but it is far from ideal. You'll probably only get a few bigger bubbles coming from the airstone that quickly escape to the surface.
ReplyDeleteCheck out my article on Methods of Diffusing CO2 in the Aquarium here for more ideas: http://www.aquatic-eden.com/2006/10/methods-of-diffusing-co2-in-aquarium.html
What if you connect 3 gas outlet tubes connecting it to 3 airstones? Would that be better?
ReplyDeleteif you only put about 1/2 tsp of sugar in per day you will in effect control the output and limit the acidity which is a byproduct of the initial boom in yeast production. this way the yeast will eat it and produce co2 in the am when you put in the sugar, and by night it has eatin all of the sugar. repeat the next morning. change the amount of sugar based on tank size, and use a 1 gallon cranberry juice bottle. lotsa water and yeast, control the co2 by controlling the sugar. :-)
ReplyDeleteFantastic thank you. Find the files you are looking for at central-mp3.com the most comprehensive source for free-to-try files downloads on the Web
ReplyDeleteAngel Asked: Any Ideas For Controlling The Amount Of Co2 Realeased Into The Tank?
ReplyDeleteWell Their Is An Answer! You Can Buy A Cheap Plastic Valve That You Can Insert Into The Tubing, They Come With A Dial With YOU CAN CONTROL The Amount Of Co2 Releasd Into The Tank.
Hope This Helps :]
there is a way to even time the CO2 diffusion into the water...connect the CO2 tubin to power head filter where there is an inlet for air. Connect the filter to a timer and ur set to go. The CO2 will only diffuse wen the filter is on..the rest of the time it just floats to the surface n escapes. It keeps the acidity level from varying durin the night when no photosynthesis is takin place
ReplyDeleteWell Their Is An Answer! You Can Buy A Cheap Plastic Valve That You Can Insert Into The Tubing, They Come With A Dial With YOU CAN CONTROL The Amount Of Co2 Releasd Into The Tank.
ReplyDeletewhat is the name of this valve?
The co2 eats away at the plastic control valve and the the gas just leaks i used a steel one but the co2 ate the rubber 0 rings :(
ReplyDeleteI bought a Hagan Co2 generator on sale for $9, the packs were out of date so amusing 1 cup sugar 1 tsp baking soda and 1 tsp dry yeast along withe hagan diffuser. Generates great for about three days then drops off quite a bit, any ideas for varying the ingrediants for longer lasting generation?
ReplyDeleteN/W
I brew beer at home. I'm seriously considering hooking the blow off tube of my main fermenting tank to my aquarium. The yeast is already working, I may as well put it to further use!
ReplyDeleteMy CO2 generator (yeast, sugar) is working well...Iam worried about nightime...I have been taking the tube out of the filter and letting it escape into the air...I'd rather pinch the tube off, but I am afraid my juice bottle will spring a leak where it is glued or the whole thing will explode...any suggestions...Ken
ReplyDeleteWould it be ok to use it at night? That is if I have air generator and air stone? If not, how do I turn it off at night?
ReplyDeletemagthegrate; how is that working for you? well?
ReplyDeleteFrom what I have read the alcohol eventually kills the yeast because it is in an anerobic state. Yeast doesn't produce alcohol in an aerobic state so why not add an inlet to the generator bottle with a small airstone and air pump. Wouldn't this keep your yeast in an aerobic state. At this point couldn't you just change part of the water in the bottle and add sugar every once and a while to keep the yeast alive?
ReplyDeleteI ran such a generator for several years on an 80 gallon freshwater set up with literally hundreds of plants.. it was a jungle... you couldn't see the back from the front.
ReplyDeleteDespite what the original author of this information wrote, you should always use a check valve. It's just too easy to get back flow from the aquarium into your generator, and the pressure built up in the generator is not nearly enough to cause a leak. If you are that concerned about pressure leaks, use silicon on the lid and around the check valve.
Also, you only need about 1 bubble of CO2 per minute. This is why you are getting a huge PH drop.. too much CO2. Use a valve such as you would use to for air filtration. The amount of CO2 generated will not deteriorate the plastic in any real length of time.. remember, the air you breathe is mostly CO2 and plastic and rubber O rings do not deteriorate quickly in air.
Allowing the CO2 to escape from a power head serves no purpose as it does not diffuse the CO2 into the water efficiently.. just as airstones don't diffuse oxygen into water... it's surface contact that does the job. Use an airstone, and position it under a coffee can lid or some other like surface under the water. You want to create a bubble of CO2, allowing the CO2 to dissolve into the water.
Would it be inadvisable to splice the yeast line into my bubblewand line with a T-connector? A whole 'nother line going into my tank would be an eyesore. Thanks,
ReplyDelete-Sully