Showing posts with label beginner. Show all posts

Sunday, February 08, 2009

Top Common CO2 Drainers in the Aquarium


So you've got your CO2 system all set up, whether it's DIY yeast powered, or pressurized, and you've even got your CO2 diffusing method set up and working great. But something's wrong. Your plants aren't growing faster, the algae is still there, and your pH isn't dropping. You check and double check your equipment and make sure there are no leaks anywhere and that CO2 is flowing fine. Chances are, all that CO2 you're pumping into your aquarium is being vented off into the atmosphere. What's the culprit? Here are the most common causes:

  1. Hang-on-back (HOB) Filters - There's a reason these filters aren't used often with high tech planted aquariums. All that water agitation involved with sucking it up and then churning it through filter media and dumping it back into the tank is sure to vent most if not all of your CO2. Try a canister or internal filter instead.
  2. Airstones - There should be no reason to have an airstone in your planted tank. The plants take care of providing any oxygen needed for fish. Using one with a high tech planted tank is sure to lower your CO2 levels. Unless this is intended (i.e. as an emergency measure when CO2 gets too high), take out the airstone! This also goes for all air pump powered figurines, etc. But if you're reading this blog you probably threw those out years ago anyway. If you haven't yet, please do, before you give Takashi Amano a heart attack!
  3. Powerhead/filter outlets - If you place powerheads or filter outlets too close to the surface of the water, they'll create turbulence which will vent CO2. Place all spraybars, filter outlets, and powerhead outlets a safe distance under the surface so you don't see too many ripples (if any at all).
It all boils down to minimizing the disturbance to the water's surface. Any excess ripples or splashing and all that precious CO2 will go up in...well, gas.

Friday, January 02, 2009

Video: How to Set Up a Pressurized CO2 System


Setting up a pressurized CO2 system for the first time can be a bit daunting. For any of you that were lucky enough to get a pressurized CO2 system for the holidays, I came across this excellent video on how to set up a pressurized CO2 system from Green Leaf Aquariums which goes through all the basic steps. Although regulators may vary, the basic steps in the video will be the same for most systems (for example, not all regulators need the working pressure adjusted). Just be sure not to screw on the bubble counter cap too tightly, or you may crack the plastic (as I did, and woke up to a puddle on the floor under the tank!).

Tuesday, December 09, 2008

Aquascaping Answers

Judging by the number of emails I get with questions about aquascaping or keeping plants, you have questions. Instead of answering them directly, I've decided to open it up and allow others to benefit from the questions and answers. So here's how this will work:

Ask a question about aquascaping, keeping aquatic plants, plant-friendly fish, lighting, CO2, fertilizing, or any other aquarium plant related question in the comments to this post, and I'll answer them in next week's edition.

Also, if you know an answer to a question posted, feel free to answer it! That way we can share information and experiences.
Finally, I'm looking for a name for the series. I've tentatively picked Aquascaping Answers, but if you have any better ideas, leave a comment!

Monday, March 10, 2008

Cheap Scapes: Tips for Budget Aquascaping

Although we look at beautiful sweeping aquascapes in magazines and books and websites in awe, not all of us can afford such an investment. A fully equipped, top of the line aquascape can easily cost in the thousands of dollars, about as much as a fancy reef aquarium. Here are some tips to save cash and have a great looking aquarium at the same time.

  1. Buy Used - Getting a brand new tank or brand new equipment may be appealing, but it often costs a fortune. Most of the money in an aquarium is devoted to lighting, filtration, and the actual tank and stand itself. Finding these used can save you a fortune. Sure, you'll have to put up with some scratches in the tank glass or maybe a somewhat noisy filter, but they'll still function just the same. Just make sure everything is in working order before you pay. The best part of this though, is that even if it doesn't work, you end up spending 1/10th what you'd spend on it new, so you can either throw it out or fix it up. eBay, Craigslist, and the For Sale section of fish forums are the best places to look.
  2. Smaller is Cheaper - We all know deep down we want a 120+ gallon tank so we can have a sweeping aquascape with hundreds of fish and plant species. Heck, who wouldn't want to follow in Amano's footsteps and create a whole room sized aquarium? The problem is, as the size expands, so does the price. Exponentially, in fact. To support that bigger tank you need a bigger stand (or even a bigger room/apartment/house!), more light, bigger filters, more power to run all the equipment, more substrate, and more money spent on stocking it with fish and plants. Compromise on size. In fact, look at a smaller tank as a challenge. Aquascaping a nano is much, much harder than a large tank. As a benefit, the maintenance won't take a whole day either!
  3. Do It Yourself - Love that fancy glass CO2 diffuser? Oops, it costs more than you paid for your second-hand tank! Not to worry, there are often many simple, quick, and best of all FREE (or really really cheap) ways to improve your aquarium. DIY CO2 can save you hundreds of dollars and DIY lighting is effective as well. You can even make a DIY filter if you've got the right tools and don't mind troubleshooting a few leaks and issues (trust me, I've done it). Although some of these DIY adventures will often result in just a temporary solution (like my DIY filter that was replaced by a second hand Eheim after a month) they can be a lot of fun and with persistence can save you money. Check out the DIY section for some example projects. DIY can also apply to the hardscape in your tank. Why buy rocks and wood when you can find it outside for free? Granted, not everyone can find appropriate rocks and wood locally and you have to be careful in what types of wood and rock you put in your tank and what it might introduce. With proper procedures though, you can get an awesome, natural hardscape for free!
  4. Be Patient - Sure you can rush out to the fish store and buy 20 tetras and splurge on 4 or 5 of each exotic high-light plant and your tank will look pretty good...for a few days. However, very soon you might be faced with a mass die off as ammonia levels spike and plants wither and rot. It's the ultimate tank meltdown as you watch all that money you spent on plants and fish melt into goo. Be patient and hold off on fully stocking your tank and don't get difficult plants right off the bat. Add new fish gradually and fill the tank up with cheap, fast growing, hardy plants to fend off algae and absorb the ammonia. These cheap plants can often be found for free, which brings me to my last point.
  5. Leverage the Community - There's a huge community of fish keepers and aquascapers out there. You can find them in aquarium clubs or online in fish forums. Most, if not all, have members who are willing to give away excess plants and fish for FREE. These are usually easy to grow starter plants or fish that are hardy and multiply quickly: perfect for a start up tank. Then, once you get established, you can return the favor and give away your excess and move on to the harder varieties. Once you have an excess of these, you can even sell them back to the community, generating some revenue to offset the cost of the hobby. Try Aquabid for cheap plants and fish; you can sell your own plants and fish there too. You probably won't break even, but it'll help mitigate the ongoing maintenance costs associated with an aquarium.

Hopefully these tips can help you achieve a beautiful aquascape without spending thousands of dollars. Although it can be an expensive hobby, you can get just as much enjoyment out if it for a fraction of the price.

Friday, February 02, 2007

Dutch Vs. Nature Style Aquariums

In the world of aquascaping and planted tanks, there are two major schools of thought: the Dutch style and the Nature style (also called Japanese style, but not to be confused with the el Natural style which is not a style of aquascaping but an entirely separate approach to keeping a planted aquarium). Both are popular styles that are based on the arrangement of plants in the aquarium and the way it is aquascaped and are by no means the only way to aquascape a tank. Most hobbyists choose to loosely follow one school based on their own personal preference of what they think looks better.


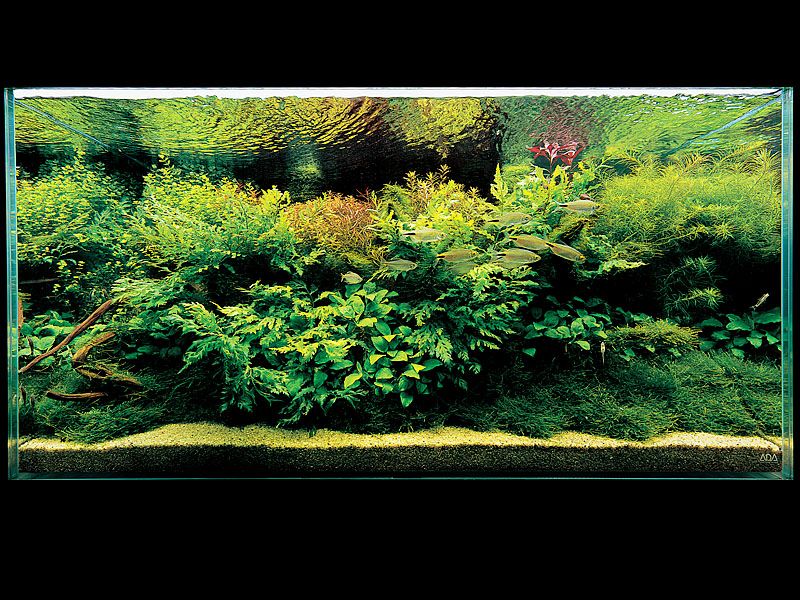
Dutch aquariums are an older style of aquascaping, dating back to early 20th century Holland. The style focuses on neat rows of plants radiating out from a central focal point, with lower plants in front and taller plants in the back (creating depth). You'll often see this described as "streets" or "avenues" using plants.


Dutch aquascapes also feature more colorful aquatic plants. They can be likened to a well kept garden, where all the plants are arranged with a purpose and kept well trimmed and defined. It may not be the most natural looking, but it is extremely beautiful and visually interesting. A significant hardscape (rock and/or driftwood) is usually not present or visible. Color, contrast, and the beauty of the individual plants is paramount.


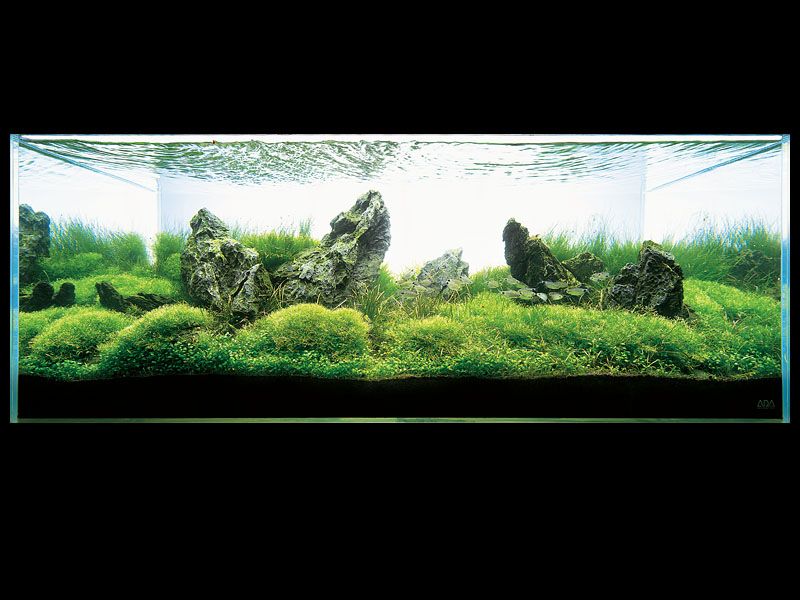
The Nature aquarium style was pioneered by Takashi Amano in the last decade. The style of this type of aquascape is very much focused on nature and imitating both natural landscapes and snapshots of natural environments. This means that a Nature style aquascape can look like a miniature version of a mountain range with tree lined slopes, or like a scene under the surface of a small river.


Hardscape usually plays a role in framing the aquascape or helps to create flow. Nature style aquascapes are often also one of three shapes: concave shaped, convex shaped, or triangular. Concave means that the height of the plants decreases to some central low point, then slopes back up. Convex is the opposite of concave, and is often called an "island" shape since the plants are low on either side but high in the middle. Finally, triangular shaped aquascapes are shaped like a right triangle, and the height of the plants slopes gradually from high on one side of the tank to low on the other. In most Nature style aquascapes, there is only one main focal point and it is almost always positioned according to the Golden Rule. Natural appearance, flow, and other Japanese gardening principles are most important

Within each of these styles there are further sub-styles that I'll explore a little further in another article.

Thursday, November 16, 2006

The Golden Rule of Aquascaping

This is the first in a series of posts about the fundamentals of aquascaping. I'm posting these because I've found them very helpful in creating an aesthetically pleasing aquascape. They are by no means the "rules" of aquascaping, just guides.

When you're planning out an aquascape, one of the most important aspects
is where it will draw the viewer's gaze. In fact, a viewer's gaze is what the aquascape is all about. The primary goal of an aquascape is to be pleasing, relaxing, and interesting to look at for the viewer. In order to do so, you need to set a sort of "anchor" for the mind. This is called the focal point. It is the point that draws the gaze of the viewer first, from which they can explore the rest of the tank. A focal point can consist of almost anything, from a red leaved plant to a rock or a piece of driftwood. The only thing it must do is draw attention. You can't have a plant that blends in with every other plant be the focal point, you have to make it stand out in some way. There are a few simple things to remember about a focal point.

First, there should only be one. Having more than one focal point leaves the mind uncomfortable and stressed, looking back and forth from focal point to focal point. Only in extremely large tanks may you have two focal points comfortably.
Second, you should have some sort of focal point in every aquascape. Not having any does the same as having too many:
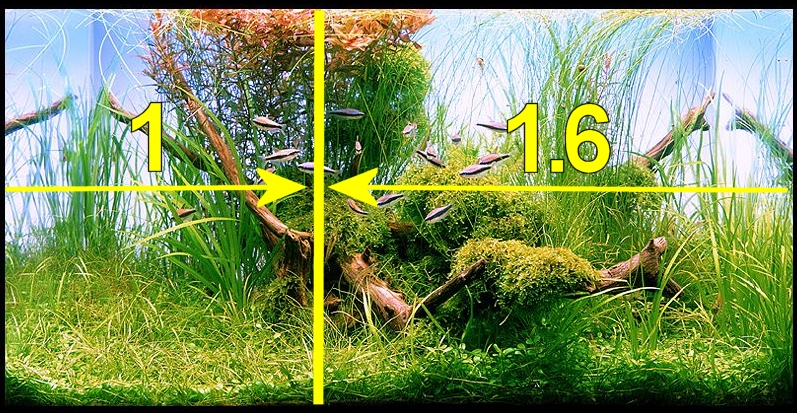
the viewer's eyes are left wandering back and forth, stressed and uncomfortable. Third, the focal point should be placed in a very particular (and special!) location. This is where we come to the Golden Rule of aquscaping. This Golden Rule dates all the way back to the Greeks. It seems the they came up with a theory that the ratio 1:1.618 was the most pleasing to the human eye. Many people assume that plopping the focal point in the middle is most pleasing, however, this will again keep your eyes wandering left and right. By placing it slightly off center, you are effectively gently guiding the viewer's eyes. You'll see this Golden Rule used in all forms of art, from paintings to architecture. But how do you use this Golden Rule in the aquarium?

It's actually fairly easy. All you need is a measuring tape (or r
uler) and a calculator. Simply measure your tank lengthwise from one end to the other. Then divide that number by 2.618. A 29 gallon tank, as an example, is 30 inches wide. 30 divided by 2.618 is 11.45 inches. Now take your measuring tape again and measure 11.45 inches from one side of the tank (you can measure from either side, but which side to put the focal point on is up to you). At exactly 11.45 inches exists an imaginary line. This is where your focal point should be centered.


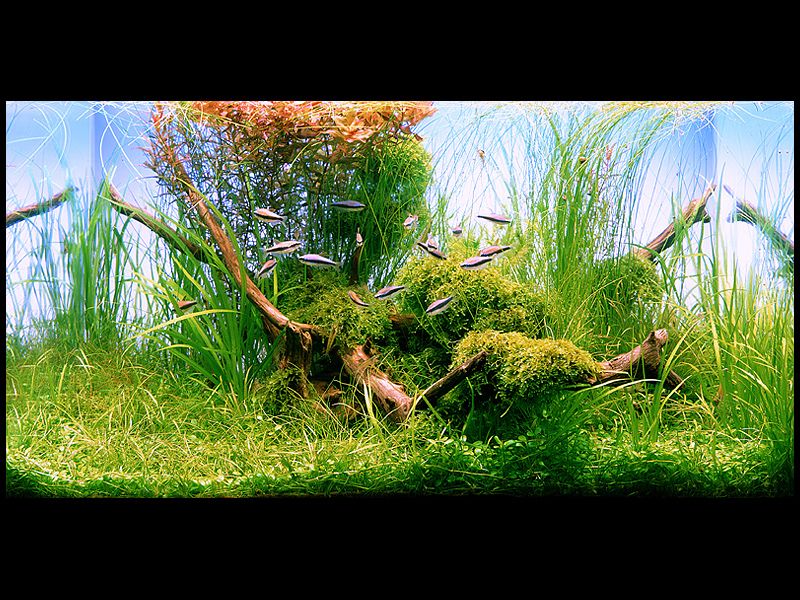
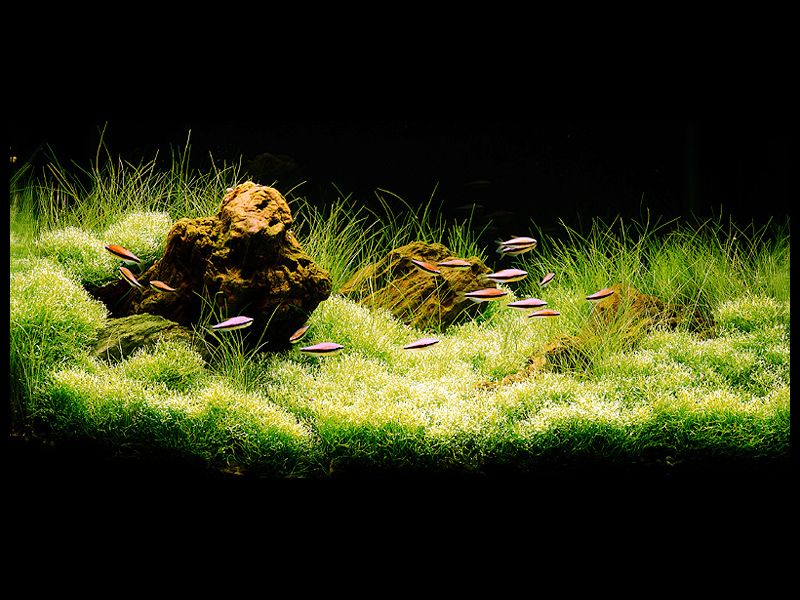
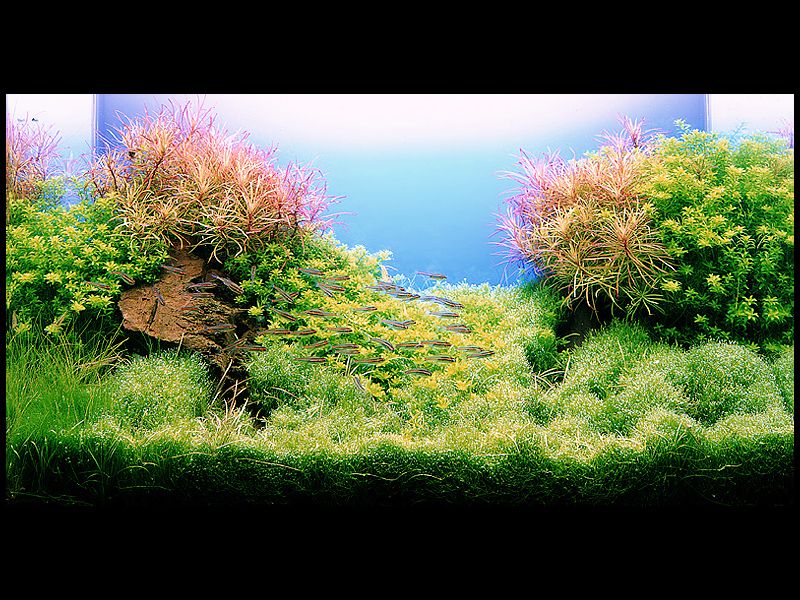
The picture above shows an example of how Takashi Amano has used the Golden Rule in his aquascape. As you can see, he has placed a red, tall pant right at the Golden Rule, creating an effective, pleasing focal point. Take a look at the following aquascapes by Amano and see if you can find the focal point and the use of the Golden Rule:

Popular Posts

Sponsors

PetSmart

Planted Aquarium Books